
Happy Tuesday everyone! Today, I'm sharing written
instructions on how I created this cute Rain Shaker Card inspired by Laura Dovalo Rasi.


Step 1: First, I gathered up the supplies I needed to make the card and colored my paper and images.
SUPPLIES: April & May Clear Stamps, In and Out Square Metal Die, Cloud and Grass Die, Distress Oxide Inks, Foam Tape, Glass Beads, Clear Thread, Scor-Tape.
I colored the ducks from the April &
May Clear Stamp Set. The rain hat on the standing duck was cut out from
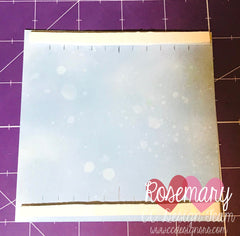
the bear stamp. I used the Cloud and Grass Die to create the cloud
panel, grassy knoll, and waves, and then colored them using Distress
Oxide Inks.

Step 2: I cut out a square scallop frame,
and glued the cloud panel to the top and the grass and waves to the
bottom. If you want to add a sentiment to the cloud portion, now is the
time to stamp it (don't wait until after you put the card together
because mounting it on foam doesn't give you the hard surface you need
to get a clean stamp).

Step 3-4: The foam tape I was using is kind
of thin so I cut an 8 ¼” strip and folded it in half on top of itself
to make a thicker 4" foam strip. I had to repeat this step a few times.


Step 5: I then cut the layered 4" foam strips in half lengthwise.

Step 6: I also cut one of the strips in half again to make a really thin strip.

Step 7: Now it’s time to measure where the
thread will go. The blue, background square is 4 ½” x 4 ½”. I first
measured to find the center and drew a little line in pencil. Next, I
measured out 5/8 from the center on both sides to get the next marks.
You want to leave a border on the edges to allow for more foam tape. You
also want to put your pencil marks above where your foam tape will go
so you can still see them as guides.

Step 8: Place your foam tape at the top and
bottom, but leave a little bit of space between the top and bottom of
the paper. In other words, do not line the foam tape at the edge of the
paper.
Step 9: Line up the clear, transparent
thread with the first pencil mark. Press the thread down onto the foam
tape using the backing paper to press the thread into the foam.

Step 10-11: Load up about 10 beads on the
thread and press the end of the thread onto the bottom foam tape.
Continue all the way across.


Step 12: Trim off the hanging pieces of clear thread from the top and bottom. Grab your Scor-Tape and more foam tape.

Step 13: Cut scor-tape the same size as the
top and bottom foam strips. Place on top of the foam to better secure
the thread to the foam.

Step 14: Cut another strip of foam tape 8
¼” long and fold in half. Cut the 4” strip of foam tape in half
lengthwise, and place on top of the top and bottom border of foam. You
will now have a double layer of foam on the top and bottom with your
clear thread sandwiched between.

Step 15: Do the same to make your side
borders of foam. To get thinner strips of foam to go between the lines
of beads cut the strip that you cut in half in half again. Tap your
embossing buddy along the edges of the foam so the beads don’t stick.

Step 16: Remove the foam tape and lay the
scalloped border scene on top. Next, add your ducks on top of thin foam
strips placed between some of the bead lines.

Step17-18: To finish off the card I stamped
a sentiment on the cloud portion (it's better to stamp the sentiment
before adhering the card together). I then glued it to a 5 ½" x 5 ½"
card base with yellow, striped pattern paper. When you shake the card,
the beads fall like it’s raining.

Enjoy!!
Rosie
1 comment:
This is awesome. I might try it.
Hugs, t.
Post a Comment