Showing posts with label Alcohol Ink on Yupo. Show all posts

Wednesday, May 23, 2018

Dies R Us: Have a MANATEE-RIFIC Day!

Happy Thursday everyone! Today, I'm sharing this scene card I created with several of the NEW Lawn Fawn Dies I bought from the Dies R Us Store! I LOVE how easily a scene card comes together using the coordinating Lawn Fawn stamps and dies. It's so much fun, and DIES R US gives me so many options!


++++++++++++++++++++++++
The links to all of the products used from the Dies R Us Store are shown below. Here is a step-by-step of how I created this card. First, I cut out two pieces of the Lawn Fawn Stitched Woodgrain Backdrop from brown cardstock.

Next, I used my paper trimmer to cut 3/4" strips, along with a 5" x 6" rectangle to glue the strips to. I was trying to create a shiplap boat wall. In retrospect, I should have used a lighter brown cardstock and inked the edges with walnut stain distress ink so you could see the strips.

I glued the strips down to the rectangle, offsetting the strips to look like a shiplap wall, and then trimmed the brown cardstock down to 4.5" x 6". Then I added a piece of 4.75" x 6.25"gold cardstock underneath.

I used a circle die and cut out the center. I used a die I had in my stash, but if you don't have any circle dies you can use the Elizabeth Craft Designs Frame It Stitched Circles.

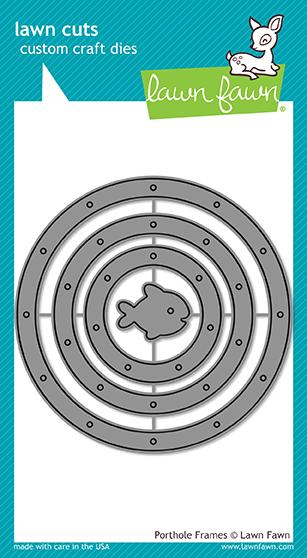
I cut out the largest Lawn Fawn Porthole Frame Die, and a plain circle about the same size from a transparency sheet. I glued the gold porthole frame on top of the transparency.

I cut two more plain circles....one from watercolor paper and one from Yupo paper. I created a sky background with markers and paintbrush on the watercolor paper. I created water with alcohol inks on the Yupo paper. Next, I used one of the Lawn Fawn Stitched Wave Border Dies to cut out the bottom "water" portion of the circle and glued it on top of the sky background.

I had an extra watercolor paper circle, and covered the top with Hickory Smoke and Black Soot Distress Oxide Inks. Then I splattered water on top and used a paper towel to pick up the excess water. This creates the lighter spots on the paper...perfect for the manatees from the Lawn Fawn Manatee-rific Stamps. This stamp set also has Coordinating Dies.

Here's the circle scene with the manatees. Aren't they adorable?!!

I wanted to create some depth so I added foam squares to the back of the shiplap/porthole cardstock BEFORE adding the circle manatee scene to the back. This puts some space between the porthole and the scene

 You can see here that there is space between the scene and the porthole.

The side view shows some of the dimension. I also added foam squares behind the sentiment banner.
 
 **********************************
Here are the Dies R Us products used:


Thermoweb 3D Foam Squares
**********************************************************************
For more inspiration, come join the fun at the Dies R Us Challenge Blog. There's a new challenge theme offered on the 1st and 15th of each month, and one lucky randomly drawn winner will receive a gift voucher prize to the Dies R Us StoreFor your convenience, all the important Dies R Us links are provided below.
Come check these out! Click below for:
FRIENDS OF DIES R US PINTEREST PAGE

Have an AWESOME Thursday!

Sunday, May 20, 2018

The Greeting Farm Stamp Feature: Happy To Sea You!

Happy Monday everyone! The Greeting Farm just had another awesome release on MAY 15th! I'm telling you they just get better and better. I love that TGF stamp sets include the various elements and sentiment to help you build a scene. You really do get the complete story when you purchase one of their sets.
Today, my card features HAPPY TO SEA YOU. This set has coordinating dies available for purchase HERE. I love the coordinating dies from TGF because they cut close really close to the image.
I love using alcohol inks on Yupo paper to make water scenes. The colors are so vibrant and the way the ink spreads around is just magical. So, of course, when I spy sea creatures, I make "water" with inks! To make the sea creatures, I used Zig Brush Markers on watercolor paper. After spreading the ink around with a waterbrush, I used a Clear Glitter Marker on top to give it some sparkle. After the glitter ink dried, I stamped my images and then die-cut them out.

I raised the sea creatures, the stars, and the sentiment on foam tape for added dimension. The white wavy border was made using a MFT Die.
Don't forget all the new stamps are available to purchase now in The Greeting Farm Store!
Have an awesome week!
Rosie

Wednesday, May 16, 2018

Dies R Us: Waving Hello with Lawn Fawn Mermaid For You

Happy Thursday everyone! It's Rosemary here sharing this scene card I created with the Lawn Fawn Mermaid For You Stamps. I really enjoy creating scene cards, and the awesome selection at DIES R US gives me so many options!! I love that they carry Lawn Fawn Stamps! It makes creating a scene card easy and fun!

 +++++++++++++++++++++++++
The links to all of the products used from the Dies R Us Store are shown below. Here is a step-by-step of how I created this card. I started off using a few of the green Distress Oxide Inks to create the ocean bottom: Peeled Paint, Lucky Clover, Bundled Sage, and Forest Moss. I rubbed the inks onto the Ranger Craft Sheet. Then I spritzed the ink with water and slid my paper all over to get the first coat of color on.


The great thing about Distress Oxide Inks is that you can keep layering to get the desired effect. After I wiped off the mat, I swiped Lucky Clover and Forest Moss across the mat, spritzed water again and then just pressed certain areas of the paper onto the mat instead of swiping across so I could get more concentrated splotches.


Next, I stamped the images from the Mermaid For You Stamp Set with Memento Tuxedo Black Ink onto white cardstock, and colored them with markers. This stamp set also has Mermaid For You Coordinating Dies you can purchase so you don't have to fussy cut the images like I did. I definitely recommend getting the dies with this set! To get the stitched rectangle wave shape for the base of my card (top left), I used the Lawn Fawn Stitched Hillside Backdrop Landscape Die. I also cut a piece of blue paper (top right) the same size as the die shape because I'm going to layer the Stitched Hillside Die-cut on top of that with foam squares for a raised effect.


For the green Distress Oxide Paper, I die-cut the bottom part of the Lawn Fawn Stitched Hillside so I could layer that on top of the blue paper with foam squares. I used the Memory Box Wildflower Landscape Die to create the plant foliage behind the green hillside.


 I saw a cute turtle and smaller fish on the Memory Box Deep Sea Corner Die so I die-cut that out of the green paper, and then cut apart the pieces I wanted to add to my scene. That's the great thing about dies! They are really versatile!!


*******************************************
Here are the Dies R Us products used:


Memento Tuxedo Black Ink Pad
Thermoweb 3D Foam Squares
*************************************************
For more inspiration, come join the fun at the Dies R Us Challenge Blog. There's a new challenge theme offered on the 1st and 15th of each month, and one lucky randomly drawn winner will receive a gift voucher prize to the Dies R Us StoreFor your convenience, all the important Dies R Us links are provided below.
Come check these out! Click below for:
FRIENDS OF DIES R US PINTEREST PAGE

Have an AWESOME Thursday!

Friday, April 27, 2018

Stamp AnnieThing: We Mermaid To Be Friends!

Happy Friday everyone! I'm back today with a special card featuring some NEW RELEASES from Stamp AnnieThing! I love her stamps so being able to participate in this BLOG HOP featuring her new MERMAIDS and UNDER THE SEA elements is a dream come true! 

Here is the line-up for the BLOG HOP:

I colored up two different Mermaid stamps with Copic Markers using the same colors. I'm loving all their gorgeous hair!! The first one is called Mermaid-Waving Hello. The second image is called Mermaid-We Mermaid To Be Friends. The sentiment on the card came from this set.

 Copics:
Skin: E000, E51, E21, E11, E13
Hair: BG11, BG18, Black
Purple: V12, V15, V17
Teal: BG11, BG13, BG15, BG18
 
I've been playing around with Alcohol Inks (Copic refills) on Yupo paper and decided to try different colors for this card. I LOVE how it turned out!! For the blue water, I used BG10, BG18, BG53, BG57, and B93. For the sandy hill I used E31, E33, E42, and YR24. The die-cut orange coral was made using R20, R22, and YR02. After I drop the various colors onto the Yupo Paper and add some drops of alcohol , I either blow through a straw or use one of those kiddie nose suction things to move the ink around.


The fish and the rock/seaweed are from the paper Die-Cut pack. These are pre-cut and printed elements that coordinate with the stamp sets. You just color them and plop them on your project....easy peasy! They have a larger white border around them, so I did trim around them with my scissors. I raised the sandy hill, mermaids, fish, and sentiment on foam tape for added dimension.


The next person on the hop is ANNIE! Be sure to hop along and check out all the designers' projects! They are MERMAZING!!

Have a fabulous weekend!
Rosie