Tuesday, June 30, 2020

I Am Roses + Conie Fong: Moonflower Lullaby

Happy Tuesday everyone! Today, it's my turn to post for I Am Roses, and I'm combining their AWESOME flowers with this fabulous digital stamp from Conie Fong called MOONFLOWER LULLABY. I think this image is stunning!
 
Copics:
Skin: E000, E00, E01, E02, E11, E13,
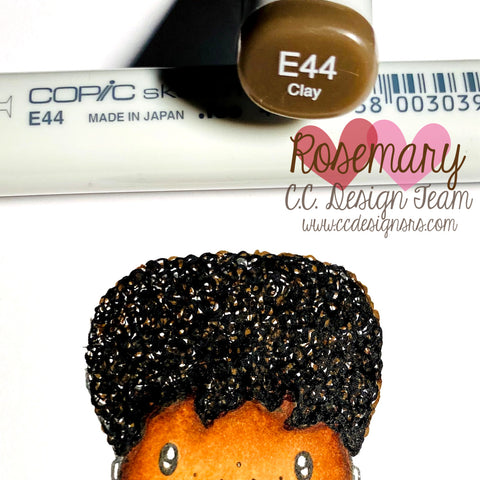
Hair: E42, E47, E49
Lips RV02, RV04, RV06
Pink: RV02, RV04, RV06, RV09
Yellow: Y04, Y21, YR21, YR24, YR27 
 
I used paper from Doodlebug Design Love Notes 6x6 Paper Pad, and finished off the card with gorgeous flowers from I Am Roses. The R43 Roses are my fave and I use them frequently as the bigger flower on my cards. Next, I used yellow cherry blossoms, followed by white small flowers. I also love all the floral sprays they carry to place above the ribbon bow.  
 
 
Remember, you have until JULY 8th to link up your project to the current I Am Roses Challenge. Be sure to use a minimum of 3 I Am Roses products on your card to qualify for a prize. I can't wait to see what you make! 
 
Hugs,
Rosie

Polka Dot Orchard: CAROLING GNOMES

Happy Tuesday everyone! I'm starting off today with a Birthday Gnome Card. I never seem to have enough birthday cards, even though I'm a cardmaker. Y'all know I love gnomes so I'm going to be showcasing several of the gnome sets at Polka Dot Orchard over the next few weeks. This guy is from the CAROLING GNOMES set. I know, I know.....those are Christmas gnomes, but that doesn't mean you can't use them for other occasions! I used a Christmas gnome set a few posts down for a Red, White, and Blue card. It's always nice to get several uses from the same set.
 
Copics:
Skin: E11, E13, E15, E18
Hair: N0, N2, N4
Teal: BG10, BG72, BG13, BG15, BG18
Red: R24, R27, R29, R57, R59
Mittens: R24, R59, BG13, BG78
Ground: W1, W3
 
The fabulous background paper is from Echo Park BIRTHDAY WISHES 6x6 Paper Pad. The square scallop frame is from My Favorite Things. The sentiment is from C.C. Designs.
 
 
Be sure to head over to the Polka Dot Orchard Store to snag your faves. So many new digis have been added! And come share your creations with us on the Friends of Polka Dot Orchard Facebook Page.

Have a great weekend! 
Rosie

Monday, June 29, 2020

Conie Fong: KISSED BY AN ANGEL

Happy Monday everyone! My 21-year Anniversary is coming up on July 3rd so I created a card for the hubby representing me and him. We've been together a total of 26 years and he and our son are the best things in my life! He loves me unconditionally and supports me in everything I do. I LOVE you bunches honey, and I will love you all my life!

The great thing about about making your own cards is that you can customize the image to more accurately resemble you! With this image from Conie Fong called KISSED BY AN ANGEL, I gave the boy a darker skin tone and a small afro. It's how my hubby looked when he was younger...and had hair, haha! 

Copics:
Girl Skin: E000, E00, E01, E11, E13, E04
Girl Hair: E42, E47, E49
Pink: RV02, RV04, RV06, RV09
Boy Skin: E13, E15, E18, E37
Boy Hair: E43, E47, E49, Black
Green: YG23, YG25, YG67, G28
Blue: B93, B95, B97, B99
Tree Branch: E44, E47, E77, E79 

The cute heart paper is from Doodlebug Design LOVE NOTES 6x6 Paper Pad. If you haven't noticed they are my favorite paper company! The sentiment is from The Greeting Farm's Make A Wish Stamp Set. The Stitched Oval Frame is from My Favorite Things. 


If you create some cards using Conie Fong stamps, please stop by the Conie Fong Art and Design Facebook Page to enter the challenges. There are always two a month....one coloring challenge and one card challenge.


Have an awesome week!
Rosie

C.C. Designs: ELLA SWISSIE

Happy Monday everyone! Did you check out the 5 new Swissies that were part of the JUNE 2020 RELEASE from C.C. Designs? They are so adorable and cute! I'm a huge fan of this fabulous line of stamps and I'm so glad they are making a come back! 
 
 There will not be a new release in July. Instead, the talented Design Team will be showcasing some older stamps during the month. Then in August, C.C. Designs will bring you some new goodies. I've already seen the sneak peeks and let me tell you, it's going to be AWESOME!! 
 
Today, Im featuring ELLA SWISSIE. Isn't she beautiful?! This set just might be one of my faves from the June Release. I stamped her on Xpress-It Blending Card and colored her skin and hair with Copics. The rest was paper-pieced and Star Dust Stickles added for extra sparkle.

Copics:
Skin: E11, E13, E15, E37, E18
Hair: E44, E47, E49, Black 
 
This adorable paper used at the top of the card and the paper for her dress are digital paper files from Etsy located HERE and HERE. The sentiment is from an older C.C. Designs Stamp Set called FABULOUS SENTIMENTS.
 
 
 I'm telling you this release is fabulous! Be sure to visit the C.C. Designs Store to grab your favorites before they sell out!

Hugs,
Rosie

Saturday, June 27, 2020

Polka Dot Orchard: From Our Gnome To Yours

Happy Saturday everyone! The 4th of July is right around the corner, and we have a lot of new people moving into our neighborhood. So I got the idea to create a patriotic "Welcome to the Neighborhood" card using this awesome guy from Polka Dot Orchard called From Our Gnome To Yours. I printed the image on Xpress It Blending Card and colored it with Copic Markers.

Copics:
Skin: E00, E01, E02, E11, E13
Hair: N0, N2, N4
Blue: B18, B28, B29, C6
Red: R24, R27, R29, R57, R59
Teal: BG32, BG72, BG75, BG78
Wood: E34, E57, E77, E79
Ground: W0, W1, W3
Sky: BG10

The fabulous background paper is from Doodlebug Design Land That I Love 6x6 Paper Pad. I just added a simple ribbon bow to finish off the card. 


Be sure to head over to the Polka Dot Orchard Store to snag your faves. So many new digis have been added! And come share your creations with us on the Friends of Polka Dot Orchard Facebook Page.

Have a great weekend! 
Rosie

Friday, June 26, 2020

Jaded Blossom: Live in the Sun, Surf in the Sea

Happy Friday everyone! Have you checked out this month's monthly challenge at Jaded Blossom? The theme for June is: SUMMER!
You still have time to play along with us! The deadline to link up your summer card is July 4th at 11:59pm PST for a chance to win a FREE stamp set of your choice!
 
My son LOVES Pixie Sticks and summer so I combined his two loves for this project. I used the Scallop Caddy Die to create a holder for his pixie sticks! 
 
 
To create the clouds, I cut a piece of cardstock using one of the cloud dies from the Border Dies 2 Set to create a template. Since this has a stitched border, I added a thin layer of glue on the back of the die cut over the stitched holes and then let it dry. If you don't do this, when you go to rub ink over the paper die-cut it will seep through the holes and leave a blue stitched border.


Next, I cut out waves using one of the dies from the Tropical Dies Set. If you have this set, you probably noticed the original wave die has the waves facing the opposite direction, but I needed the waves to face to the left since my cute grasshopper faced that way. When I ran the paper and die through the cutter, I used a clean cutting plate so I didn't have any marks on the backside of the die. This allowed me to flip it and use the backside without having a bunch of marks/indentions.
 
After I cut the waves, I used the Scallop Caddy Die cover plate to cut out the wave panels so they were slightly slanted. Then I applied Distress Oxide ink (Broken China, Blueprint Sketch, and Chipped Sapphire) over the wave panels and splattered water on top. I also cut out white waves to layer behind the blue panels. The waves were adhered using foam tape for extra dimension. The awesome surfboard and sentiment are from the SURF'S UP Stamp Set. The cute, happy, and adorable grasshopper is from the Baby Bugs Stamp Set (the Freebie set from May).
 
 Copics:
SURFBOARD:
Teal: BG10, BG32, BG13, BG15
Orange: YR04, YR07, YR0
GRASSHOPPER:
YG23, YG25, YG67, G28
Wings/Belly: YG21, YG03
Tongue: E04 
 
We hope you come play along with us! For more inspiration head over to the Jaded Blossom Blog! And be sure to check out the Jaded Blossom Store for all your stamps and gift giving supplies. They have various Cutting Dies to make party favors along with Favor Bags and Boxes.
 
Hugs,
Rosie

Rachelle Anne Miller: TEA PARTY

Happy Friday everyone! Today, I'm showcasing a card featuring a digital stamp from an amazing artist from Australia named Rachelle Anne Miller. I love her sweet, whimsical style! She sells Art Prints and Greeting Cards, and recently added Digital Stamps to her store. I am also excited to announce that I am part of the Rachelle Anne Miller Creative Studios Design Team! I get to work alongside some fabulous and talented women, and I'm so honored to have been chosen. There are lots of exciting things to come so head over to the site and sign up for Rachelle's newsletter so you can be the first to know. Just scroll to the bottom of the site and you'll see the area to enter your email address.

My card features an adorable scene called TEA PARTY. I am so in love with these two sweet girls sharing some tea and great times. Aren't they adorable?! I printed the scene and colored it with Copic Markers...a lot of markers, LOL!

 COPICS:
Girl 1 Skin: E000, E00, E01, E11, E13
Girl 1 Hair: E42, E47, E49
Girl 2 Skin: E11, E13, E15, E18
Girl 2 Hair: E44, E47, E49, Black
Doll Hair: YR21, YR23, YR27
Pink: RV02, RV04, RV06, RV09
Purple: V12, V15, V17
Green: YG23, YG25, YG67, G28
Teal: BG32, BG13, BG15, BG18
Yellow: Y04, Y21, YR21, YR23
Bunny: C0, C1, C3
Bear: E41, E42, E43, E44
Wall: R81
Baseboard: N2, C1
Wood Floor: E34, E57, E59, E77, E79, Multiliner
 
I found the perfect Tea Party digital paper on Etsy  from Erin Bradley Designs for the background. To keep the focus on the image I just added a bow and enamel dots in the corners.

  
Be sure to come over and join us on the Rachelle Anne Miller Digital Stamps Facebook Group to share your fabulous creations! All members receive a 20% discount on her digis, but you have to head over to the group to get the Discount Code. Also, the prices in her store are in Australian dollars. If you live in the U.S.A. you will pay a lower amount!

Have a great weekend!
Rosie

Tuesday, June 23, 2020

C.C. Designs: Teen Swissie Afro Hair Tutorial

Happy Tuesday everyone! I had several people asking me how I created the Afro on Teen Swissie for my C.C. Designs Release Day card so today I'm sharing a tutorial. I use Copic Markers for my coloring medium.


STEP 1: I stamped my image onto Xpress-It Blending Card using C.C. Designs Black Olive Ink Pad, and colored his skin using E11, E13, E15, E37, E18. Next, I used Copic Black 100 to create the base squiggly lines. This helps to hide the stamped hair line. At the top of the pic you can see how I scribble the marker to create random circles (I scribble clockwise and counter-clockwise to fill in the space). I leave some large open circles, because I'm going to fill those in with some brown.


STEP 2: I bring in with E49 and continue to add squiggly lines to fill in more of the white areas.


STEP 3: I bring in E47 and continue to add squiggly lines filling in more of the white space.


STEP 4: For the final step, I bring in E44 and I add dots over the hair to fill in the white spots especially those closer to his face.


This is the final result of his hair all colored in.


I hope this inspires you to try a different hairstyle on your C.C. Designs characters!

Hugs,
Rosie

Thursday, June 18, 2020

C.C. Designs: SNOW SWISSIE

Happy Thursday everyone! I'm a huge fan of the C.C. Designs Swissies and the JUNE 2020 RELEASE brought 5 new ones to the store! They are AWESOME! Today I had the chance to color up SNOW SWISSIE. Isn't she adorable? She will make perfect teacher cards when school starts back up. 
 
Copics:
Skin: E11, E13, E15, E37, E18
Hair: C3, C8, Black
Red: R24, R27, R29, R57, R59
Blue: B16, B26, B18, B29
Yellow: Y21, YR21, YR23, YR24, YR27
Star Dust Stickles 
 
This adorable paper is a digital pack from Etsy called Snow White Digital Paper Kit. The enamel dots are from C.C. Designs.
 
 
I'm telling you this release is fabulous! Be sure to visit the C.C. Designs Store to grab your favorites before they sell out!
 
Hugs,
Rosie

Wednesday, June 17, 2020

The Greeting Farm JUNE Stamp Feature: 'LIKE' LIKE YOU


Happy Thursday everyone! We are on the last day of Stamp Features for the JUNE Release at The Greeting Farm. Remember, today is the last day to participate in the BLOG HOP for a chance to win this entire release! Comment on all the DT Blogs before 12pm CST!
 
My card features two of the characters from the new set called LIKE LIKE YOU. I decided to make a clean and simple scene to show off these cuties. They remind me of me and my hubby when we were younger.
 
Copics: 
Boy Skin: E13, E15, E37, E18
Boy Hair: C3, C8, Black
Girl Skin: E000, E00, E01, E11, E13
Girl Hair: E42, E47, E49
Red: R24, R27, R29, R56, R59
Jeans: B93, B95, B97, B99
Black: C5, C8, Black
Teal: BG32, BG13, BG15, BG18, BG78
Plaid Skirt: R24, R59, BG32, BG78
 
I created the sky using Blue China Distress Oxide Ink and a cloud die-cut. The grassy hill was created using a die from Jaded Blossom Mushroom Die Set. I distressed the grass using Mowed Lawn Distress Oxide Ink, and then splattered water on it. The grass panel, characters and sentiment are raised on foam tape for extra dimension. 
 
 
Be sure to head over to The Greeting Farm Store and grab your favorites. You're going to LOVE them all!
 
Hugs,
Rosie

Tuesday, June 16, 2020

The Greeting Farm JUNE Stamp Feature: BED HEAD


Happy Wednesday everyone! We are on Day 2 of Stamp Features for the JUNE Release at The Greeting Farm. Today, I'm featuring a set called BED HEAD. This awesome set comes with a bed and then various character heads to place in the bed. There are even pets to add to the bed. It's really BRILLIANT!!
 
 Copics: 
Boy Skin: E13, E15, E37, E18
Boy Hair: C3, C8, Black
Girl Skin: E000, E00, E01, E11, E13, E04
Girl Hair: E42, E47, E49
Book: C5, C8, Black, Gold Sharpie
Phone: BG32, BG72, BG75
Pillows/Bedding: Paper-Pieced
 
I decided to try my hand at paper laying. While it's a tedious process, I LOVE the look! I definitely want to try more of it in future creations. You can see here the various layers separated by foam tape. 
 
 
The decorative papers and the sentiment over the bed came from My Mind's Eye On Trend 6x6 Paper Pad. I love the gold foiling throughout this pad. The wood paper was from my stash. I created the white baseboard by scoring two lines close together and then cutting it.
 
 
Be sure to head over to The Greeting Farm Store and grab your favorites. You're going to LOVE them all!
 
Hugs,
Rosie