Showing posts with label Memory Box. Show all posts

Tuesday, March 23, 2021

Dies R Us: Memory Box Butterfly Heart

 Happy Tuesday everyone! It's Rosie here today showing you how to create a simple, colorful card using 1 die and rainbow patterned paper! I absolutely love this die from Memory Box called BUTTERFLY HEART. I think it makes a dramatic presentation on any card.


Let's Get Started!

Step 1: This die does not cut all the way through which is the brilliant part. It just cuts the outer part of the wings of each butterfly so you can then pull the wings up to create dimension. I cut two butterfly hearts, one from white cardstock and one from rainbow patterned digital paper.

Step 2: I used a craft knife to cut out each butterfly from the rainbow paper. This was the time-consuming part of making this card. If you are short on time, you could just use markers to color each of the wings on the white cardstock. I was just worried I would get ink on the surrounding white areas.

Step 3: Match up and glue the rainbow butterflies on top of the white butterflies. I did one butterfly at a time to make sure I matched them up correctly.
 
Step 4: Find a sentiment you like and stamp it below the butterfly heart. Next, cut a piece of red cardstock at 4"x5.25" to go under the butterfly card panel which is 3.75"x5". Then, glue it to the white card base measuring 4.25"x5.50". The last step is to bend all the butterfly wings upward to create the dimension.
 
Here it is all assembled!

These are the products I used:

Memory Box Butterfly Heart
 
Mama Elephant Everyday Greetings
(this set is not in the store, but you can use any sentiment from your stash)


Art Glitter Glue or Best Glue Ever

Don't forget to come join in the fun at the 
Dies R Us Challenge Blog.  There's a new challenge theme offered on the 1st and 15th of each month, and one lucky randomly drawn winner will receive a gift voucher prize to the Dies R Us Store.  For your convenience, all the important Dies R Us links are provided below.

Thank you for stopping by! Have a great week!

Tuesday, March 2, 2021

Dies R Us: MEMORY BOX SCENE CARD

 Happy Tuesday everyone! It's Rosie here today showing you how to create a scene card using all Memory Box Dies! I have a lot of tips and tricks for you throughout this tutorial so I hope it helps you when you are creating with dies.


Let's Get Started!

Step 1: I cut two of the Open Branch Tree dies: one from brown cardstock and one from green.

Step 2: Cut the leaves only off the green tree and glue to the brown tree.

Step 3: Cut several trees from brown chipboard and brown foam. We are going to layer these on top of each other to create a thick tree for dimension. I usually use foam tape, but since these branches and leaves are so thin, it's easier to cut several trees and glue them together than trying to get a thin sliver of foam.

Step 4: Glue all the layers together. I will say the foam was difficult to glue in between the layers because it kept wanting to shift. The next time I will use only chipboard. Look at that thickness though!
 
Step 5: Next cut a spring/floral border from white cardstock. I used the Memory Box Spring Border, but it's not available in the DRU Store. I've linked other borders you can use below.

Step 6: I used Mowed Lawn Distress Oxide Ink to color in the grass and leaves. To avoid getting ink on the flowers, you can lay a scrap piece of paper over them or tape over them with painters tape.
 
Step 7: I used Copic Markers to color the flowers in rainbow colors.

 Step 8: I glued the spring border panel down to a piece of blue cardstock that is cut to 5" x 6".

Step 9: To complete my card layers, I cut a piece of black cardstock to 5.25" x 6.25" to go behind the card panel. The white card base is cut to 5.5" x 6.5".

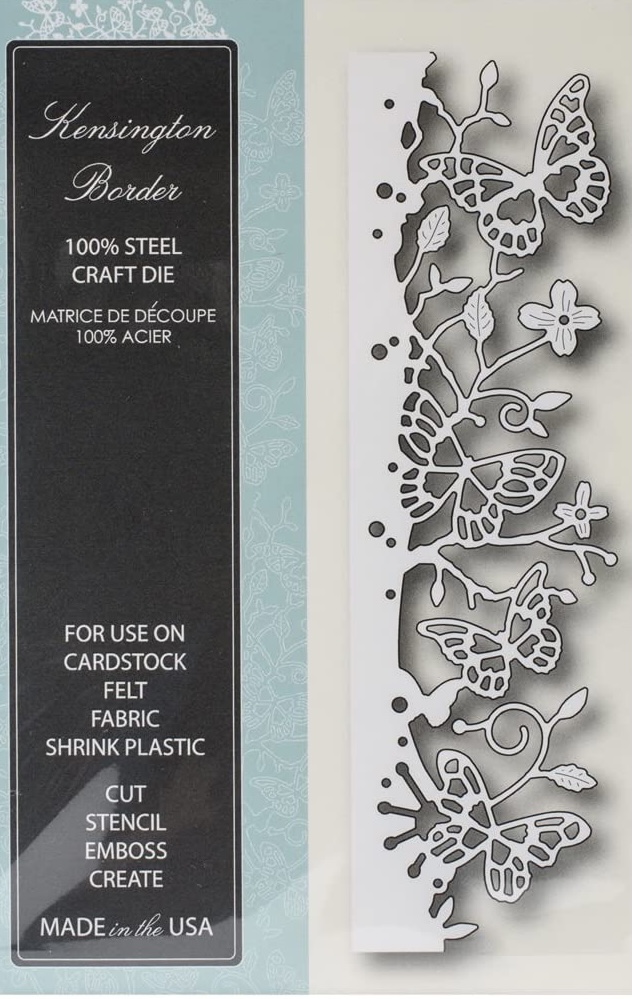
Step 10: I decided I needed some butterflies. I cut the smaller butterfly from the Precious Butterflies set from rainbow colored paper. I realized the top intricate butterfly from the Kensington Border fit over the small precious butterfly almost perfectly. There is also a piece on the Kensington Border (in the middle, next to the flower) that looked like antennas so I cut three Kensington Borders from black cardstock. I also cut another tree from black cardstock so I could use some of the leaves for the butterflies bodies.

Step 11: I decided I needed a smaller butterfly so I cut out the 2nd butterfly from the bottom of the Kensington Border. Then I traced it on patterned paper to form the body. If you have intricate dies like this butterfly, but need a solid base you can always trace around the intricate die-cut to get the shape you need.

Step 12: Assemble the butterflies by gluing the intricate outline to the main body, then the antennas, and finally a leaf on top for the body. Here are the butterflies all put together.

I found a sentiment on the Mama Elephant She's So Lovely Set that fit perfectly with the butterflies on this card so I stamped that along the bottom.


These are the products I used:
Memory Box Spring Border 
(this is sold out, but you can pick from these flower borders HERE)

Mama Elephant She's So Lovely

Don't forget to come join in the fun at the 
Dies R Us Challenge Blog.  There's a new challenge theme offered on the 1st and 15th of each month, and one lucky randomly drawn winner will receive a gift voucher prize to the Dies R Us Store.  For your convenience, all the important Dies R Us links are provided below.

Thank you for stopping by! Have a great week!

Tuesday, February 23, 2021

Dies R Us: It's Cold Outside

Happy Tuesday everyone! How is everyone surviving the polar vortex that hit our country? I live in Oklahoma and it was soooooooo cold here! We are not equipped to handle multiple days of snowy weather and below zero temperatures. I'm so thankful we didn't lose our electricity! When I saw this Memory Box die called Stitched Circle Snowman, I was inspired to create a winter shaker card. 

 
Let's get started!

 Step 1: I cut my white cardstock to 3.75 x 5. Then I laid the die on top of my paper and cut it out. I love this die because it adds a stitched circle border and just cuts out the center area leaving the entire card intact.

 
Step 2: I cut a clear sheet of acetate just a tad bit smaller than my card panel (3.5 x 4.75) and glued it on the backside of the card panel.
 
 
Step 3: Now, you will want to pick out your sentiment and stamp it before adding your foam tape to the back. I forgot to add the sentiment so my pictures are out of order. If you add your foam tape before you stamp your sentiment, then just be sure to reinforce the area you are going to stamp on with extra foam tape so it provides a firm surface to stamp on. I used the sentiment from Lawn Fawn's Winter Alpaca because it is definitely cold outside!
 

Step 4: Next, add your foam tape. You will want to add the foam tape close to the stitched circle border so your shaker elements stay within the circle area. Otherwise, they will fall below the snowdrift and you won't be able to see them.
 
 
Step 5: Next, cut a piece of decorative paper just a little smaller than your card panel so you can enclose your shaker pieces after you add them. 
 
 
Step 6: I framed the card with more decorative paper cut to 4 x 5.25. Then I adhered the entire thing to my card base which measure 4.25 x 5.5.
 
 
These are the products I used:

Don't forget to come join in the fun at the 
Dies R Us Challenge Blog.  There's a new challenge theme offered on the 1st and 15th of each month, and one lucky randomly drawn winner will receive a gift voucher prize to the Dies R Us Store.  For your convenience, all the important Dies R Us links are provided below.

Thank you for stopping by! Have a great week!