Thursday, February 24, 2011

ATC inspired by Claudine Hellmuth

This week's challenge over at the CropStop Challenge Blog is to make an Artist Trading Card (ATC) inspired by Claudine Hellmuth. This was definitely a challenge for me because I've never made an ATC in my life!! Not only did I have to look up what an ATC was, but then I had to look up Claudine Hellmuth. She's been featured on many shows including Martha Stewart. Fortunately for me, there were a lot of YouTube videos and information that came up when I did my search. Here's a link from her Martha Stewart appearance.

One of the things she's known for is her photo collages. They kind of have that 1950s vintage paper doll look to them. She also uses canvas and acrylic paints on a lot of her work. You can buy her products at CropStop here. Her acrylic paints come in 15 colors, but can be mixed together in different combinations to produce over 51 true colors. The colors do not become muddy when mixed together, which is AWESOME! Check out her color-mixing video here.

Here is my first attempt at an ATC (these little babies are small...they only measure 2 1/2" x 3 1/2"):

I used canvas with a triple coating of Gesso (this is basically a white primer for the canvas so the paint goes on smooth and bright). You can purchase Claudine's sticky-back canvas here. For the blue, I watered down some acrylic paint and used Claudine Hellmuth's paint brushes to spread the acrylic across the top. I didn't have any green acrylic paint so I used my Apple Green Prismacolor Marker for the bottom green area.

The stamps are all CTMH (True Happiness D1365 & Wishing Star D1333). I used Black Staz-On ink to stamp the images on an extra piece of canvas. When you stamp on canvas it doesn't produce a very crisp image because of the ridges in the canvas, so I took my Copic Mulitliner SP-0.1 and went over the stamped images. Then I cut them out and glued them to my ATC.

I took a photo of my son, reduced the size on my copier, and made a black and white copy. I used tracing paper to trace his clothes, keeping the lines simple like a paper doll. I photocopied the tracing paper image onto white cardstock and cut it out. I cut out the face from the black and white photo and glued it to the traced cut-out.

I colored his clothes with Copics B02, BV23, and Colorless Blender. For the skin parts I used E51. I used Sweet Pea Flower Soft for the bouquet of flowers, and just used a Green Sharpie to draw in the flower stems. To give my ATC some dimension, I used pop-dots to raise the paper doll off the ATC.

I hope this inspires you to try your hand at making an Artist Trading Card. Here's a link I found that goes over the general rules for making and trading an ATC....yes, there are rules! Now....go make one of these little treasures and link it to our challenge at CropStop for a chance at winning! Also, don't forget about the 10% discount code located on my sidebar for the CropStop store....they ship fast!!

I also want to say a big thank you to all of you for stopping by my blog and leaving me love! You guys are always so kind and your feedback is so inspiring and uplifting!

Hugs,
Rosemary
Photobucket

Thursday, February 17, 2011

CropStop Creative Team Debut!

Today’s my official start date as a member of CropStop’s Creative Team, woo hoo!! And to top it all off they are showcasing projects from each Creative Team member on the CropStop Challenge Blog. Every Thursday a new challenge goes up on the blog and you have until the following Wednesday to link your project. The winner is announced on Friday and wins an AWESOME prize! We also pick some projects to receive our Cream of the Crop Award (and you get a blinkie to add to your blog)! And don't forget about my 10% discount code located in my sidebar!!

This week's challenge is a sketch challenge by Gloria Stengel. Here's the sketch:

I knew I wanted to do something special since it was my very first Creative Team project. I decided to make a 12-drawer Easel Card Dresser. The Easel Card on top follows the sketch for this week’s challenge.
I followed this tutorial here to make the matchboxes and sleeves. However, when I was making the matchbox sleeves, I realized the measurements on the tutorial were a little off. I cut my sleeve panel 7 5/8" x 3 2/16", and scored my sleeves at these intervals using my Scor-Pal (I measure and mark my lines with a ruler and then use my Scor-Pal): score at 1", 3 5/16", 4 5/16", and 6 5/8".
I glued 3 matchboxes with sleeves on top of each other using Fabri-Tac glue. I usually use my Scor-Tape for the entire project, but I was running low so I had to use glue to put some of it together. This, of course, takes longer because you have to wait for the glue to dry. :(

For the embossed side panels, I cut a piece of white cardstock 5 2/16” and scored at 1” from both ends. Then I ran it through the Cuttlebug with the Swiss Dots Embossing Folder. I glued that piece to one side of the 3-stacked matchboxes. After that dried, I glued the stacked matchboxes onto the bottom 6x6 chipboard piece (following the tutorial). Then I added glue to the tops of the matchbox sleeves and pressed the top chipboard piece into place (pushing the matchboxes inward with my hands at the same time to keep the top of the matchboxes from spreading outward).

For the front drawer panels, I glued rectangle pieces of pink cardstock and then layered white cardstock, embossed with Swiss Dots, on top of the pink. The little drawer pulls were little wooden knobs from Hobby Lobby. I painted them pink with Anita’s Baby Pink Acrylic Paint (about 3 thin coats).
For the Easel Card, I used Ballerina Tilda. I colored her with Copics and did my shading with chalk. I added Star Dust Stickles to her dress and tiara and added a small pearl to the middle of her tiara. I used Scor-Tape to put the Easel Card together because it’s really strong and holds like nothing else!! I generally use it for all my layered cards and 3-D projects! The white panel behind Tilda is embossed again with Swiss Dots. The white and pink cs are both distressed with Worn Lipstick Distress Ink. Then Cotton Candy Stickles were added around the edge of the white embossed cs.
The light pink rose paper came from my stash. The pink paper with white dots is from a Tim Holtz paper pack. The lace ribbon is from The Paper Studio. The flowers and pearl swirl accent are from the Recollections Boutique Fleur line at Michaels. The mini pink roses in the corners are from Wild Orchid Crafts.
On the bottom part of the Easel Card, I punched out the sentiment with the EK Success Real Estate Sign Punch. The sentiment is from a CTMH stamp set and embossed using VersaMark and Zing Pink Embossing Powder. I edged the punched shape with Cotton Candy Stickles and sponged Worn Lipstick Distress Ink all over the embossed sentiment. The sheer ribbon is from my stash, but CropStop has some really cute sheer pink ribbon with ruffle edge here. The border on the white cs was made with a Martha Stewart Border Punch. This punch is currently not in the store, but you can view other MS punches here.

Here's a side view:

I hope you enjoyed my very first CropStop Creative Team debut project. I spent a lot of time and love putting this together! Don't forget to head over to the CropStop Challenge Blog and link your project for the weekly drawing, and good luck!

Hugs!

Rosemary :)
Photobucket

Tuesday, February 8, 2011

Angie's Distress Ink Blog Candy

If you haven't heard of Angie from http://www.scrapgirl-angie.blogspot.com then head over to her blog right away because this gal is amazing!! Not only is she an expert card designer, but she's especially talented at coloring with distress inks.

To top it all off, she's offering a free membership to her Distress Ink class as some amazing blog candy here!

Distress Ink Class

The candy ends Feb. 13th and the winner will be announced on Feb. 14th, so head over there right away and enter! I'm keeping my fingers crossed, because I sooooooo want to win this!!

Hugs,
Rosemary :)

Wednesday, February 2, 2011

CropStop Creative Team & Discount CODE!!

I have great news everyone that I can finally announce.......I am now an official member of CropStop's CREATIVE TEAM!!!! I am soooooo excited and let me tell ya it's been tough keeping the secret!! You can see the announcement with the list of wonderfully, talented CT ladies on CropStop's blog here. There are 6 new ladies joining the current team (see my sidebar for the CT blog links). You can also participate in CropStop's weekly challenges for a chance to win some prizes!

The other great news is that I get to offer all of you a code to get 10% off your orders at CropStop.com....WOO HOO!! The code is CTRB-01 and it's on my sidebar too! Now go....well wait until you see my post and leave me some love, haha....then GO straight over to the store and check out their awesome products.

Today, I wanted to show you one of the cards I submitted for their Creative Team Call based on a sketch by CropStop's Sketch Artist, Gloria Stengel.

The black cardstock is from Recollections. The map paper and red cardstock came from my stash. I tore it all along the edges and smudged Vintage Photo Distress Ink around it to give it a weathered look. I stamped swirls on the cream dp behind Tilda and used the Martha Stewart French Scroll Border Punch on the black cardstock (love the elegance of this punch!). I handwrote the sentiment with a Versamark Pen and embossed with Stampendous Gold Tinsel Powder.
The flower was cut out from a piece of dp in the DCWV Once Upon A Time paper stack. I covered each of the petals with a lot of Glossy Accents and went along the edges of the petals with Star Dust Stickles (my fave!). I wanted it to look like a jewel. The pearl center is a button I had in my stash (I cut the back off and then glued it down). I took gold ribbon cording from Michaels and wrapped it around the paper to look like a necklace that Pirate Tilda might find in her travels. Everything is raised up on pop-dots...Pirate Tilda, the paper frame around Tilda, the sentiment, and the flower!

I paper-pieced Pirate Tilda's shirt and head-wrap from red paper (I don't have any red Copics....a problem I plan to fix this year, haha). I love that you can paper-piece clothes to get the color you want. I used my black chalk to shade her red dress and head-wrap and then cut out the pieces.

I colored her boots and flag with Copic BV23 and shaded with black chalk. I added Glossy Accents to her boots to make them shine. I used Copic E51 for her skin and shaded with some tan colored chalk around the edges of her face, arms and legs. Her cheeks got a light coating of red chalk. I colored her skirt and the band in her head-wrap with Copic Black and then added Star Dust Stickles.

Here's a side view so you can see the dimension:

I can't wait to start creating cards as a CropStop Creative Team member for the various challenges we are going to have on the blog. This is something I have been wanting for a long time and am so blessed to have this opportunity!

Much love to you all for all your continued support and wonderful comments!

Hugs,
Rosemary
Photobucket

Wednesday, January 26, 2011

CropStop Challenge #3 Square plus a Die Cut

I'm back again with a submission for CropStop's Challenge #3, which is to make a square card and use a die cut on it. How easy is that!

I've been wanting to make those cute, paper corner bookmarks that I've been seeing everywhere, and decided two is better than one, right? I made two corner bookmarks from this tutorial and added them to the top corners of my card.

Originally, I was going to leave the card pretty plain because I wanted to show off these AWESOME papers from the Close To My Heart "Wings" Workshop on the Go (G1016). It's not a color combo I would generally put together (sweet leaf green, twilight blue, vineyard berry, and black), but I LOVE it! Then I decided I needed to put some dp in the corners so when the bookmarks are in use the card isn't completely bare.

Here's my card with the bookmarks on:

I used Spellbinder's Nestabilities Label 10 and cut the frame from Vineyard Berry Cardstock (CTMH). I then put popdots behind the frame to give it some dimension. The word "DREAM," and also the sentiment on the bookmarks came from the same CTMH stamp set, Dreams Come True (D1470).

I stamped DREAM directly onto the green dp and then went over it with a black Sakura Glaze pen. It gives it a shiny, embossed look. I did have to go over the word a few times with the glaze pen (the ink tends to soak into the paper so it takes a few layers and a little bit of patience). I was trying to avoid the mess of pulling out the black embossing powder, but it probably would have been quicker to just emboss it.

I used Tilda with 3 Flowers. She's colored with Copics and some chalk. I added stickles to the lacy parts of her dress and also to the flowers. I actually had her colored up sometime last year. Since she matched my card, I added her (definitely helps to have some images colored up ahead of time). She's raised up on popdots too.

Here's a side view (without the bookmarks) so you can see the dimension:

Here's a closeup of the bookmarks:

I taught these to the ladies in my CTMH Hostess Group and they loved them. These are definitely great teacher and friend gifts. The stickled-up butterflies are made from Martha Stewart punches. I then added CTMH Pearls (Z1336) for their bodies. the bottom border is punched with a MS border punch.

For some reason, we had a huge laugh when I said...."Now, you just need to stickle up your butterfly." It's now a running joke on our facebook pages..."hey, don't forget to stickle your butterfly" or "doesn't she know you don't have time cause you need to stickle your butterfly." I think we were just tired, LOL!

Thanks again for peeking back in and leaving me wonderful comments. I wish I had the time to do a card every day, but so far a card a week is working out well for me. I find participating in challenges helps get my creative juices flowing, so I think that's the route I'll be following for a little while.

Happy Wednesday and see ya back here soon!
Rosemary :)

Wednesday, January 19, 2011

CropStop Challenge #2 Add Some Stickles

First off I wanted to say a big "Thank You!" to the ladies at the CropStop Challenge Blog because they named my previously posted Valentine Card as a "Cream of the Crop" card. So now, I've got a little blinkie on my side bar....WOO HOO!

Now, here's my card for their second challenge which is to add some Stickles. I've got stickles all over the place on this card, and on my kitchen island, and on my hands and fingers, LOL! I used Tilda with Birdcage and colored her with Copics and chalk. I'm still building up my Copic supply so I've been trying chalk for my shading and I have to say I like it. It blends easily and chalk is way cheaper than Copics, that's for sure! (I use eyeshadow makeup sponges and unused lipgloss sticks that I got from ELF cosmetics).

My papers are from different companies. I can tell you the background floral dp and shiny dp with birds & ladybugs came from Autumn Leaves. The green dot dp came from DCWV Nana's Nursery Baby Boy. The dp for the butterflies came from my stash and they were cut out using my Martha Stewart punches. The edges of the red dp that's matted behind the colorful dp got a dose of stickles too, along with the flowers/roses and edges of the butterflies. Now you know why I had stickles everywhere. The red velvet ribbon is from Michaels. I hand wrote the sentiment.

I added stickles to the red areas of Tilda's clothes and her bow and also the little red covering on the birdcage. I cut the white mat behind Tilda with Spellbinders Nestabilities Classic Scalloped Ovals Large and embossed it with Cuttlebug Swiss Dots.

Here's a closeup of the flowers/roses:

The rolled rose was made by following Tracey Mason's tutorial here. I need more practice! The other flowers/roses are from Wild Orchid Crafts.

Here's a side view so you can see the dimension:

Hope you enjoyed my creation! I wanted to say a big "thank you" to everyone who leaves me comments. It's so encouraging to have fellow crafters say such nice and lovely things. It's makes me smile to read them all! And a big "thank you" to those of you that are now following my blog. My numbers are slowly increasing, woo hoo!

Hugs!

Rosemary :)

Wednesday, January 12, 2011

CropStop Challenge #1 Sketch with Dangling Tilda

One of my goals this year is to participate in more challenges and get more cards/projects done. I find my creative juices flow better when I'm a little under pressure and have a deadline to meet, haha!

As I was visiting blogs and online stores, I found out that the online store CropStop started a new challenge blog and their first challenge is a sketch challenge. Here's a picture of the sketch designed by Gloria Stengel:

Here's my take on her sketch (I flipped it sideways):

The bottom brown patterned paper is from DCWV Once Upon A Time pack. The cream paper is from CTMH and I used a background stamp from Inkadinkado for the writing (stamped twice next to each other). On the cream paper behind Tilda, I distressed the edges with Memento Rick Cocoa ink and used a small scroll stamp from CTMH Take a Picture stamp set. The brown polka dot paper and all the cardstock is from my stash. I distressed some of the paper edges with scissors. The pink heart brads are from The Paper Studio. The word LOVE is from CTMH Amore stamp set and heat embossed with ZING! Embossing Powder in Rose.

I used Dangling Tilda and Elegant Heart Ribbon from the Magnolia Raising the Ceiling 2010 Collection. I stamped the bow twice and raised the top bow with popdots. Then I put popdots behind Tilda, the bow, and the ribbon and raised the entire image to give it more dimension. I colored Tilda with Copics and most of the shading was done with chalks. I added star dust stickles to the lace areas of her shirt, lace on the basket, and the hearts.

I made the cone baskets in the corner of my card by punching out circles (1 7/16" punch) and then rolling the sides in to form the cone. I punched out a bunch of small hearts, shaded them with chalk, and covered them with stickles. I cut 3 triangles that fit inside my cones and glued hearts to the top of the triangles. Then all I had to do was insert the triangles, whew!

I had the really thin polka dot ribbon in my stash. It was a really light pink so I colored it with Copic R32. I attached the ribbon strips to the inside of the cones and then tied 3 little bows to go on the sides (and yes.....I almost got a finger cramp trying to get those suckers tied, LOL!).

Here's a side view so you can see the dimension:

Thanks for visiting! Hope to see you back here again soon!

Hugs!
Rosemary :)

Tuesday, January 11, 2011

Edwin Frames and Christmas at my Mom's

I've been MIA these past few weeks because we were visiting my mom in WA for the Christmas holiday, so I haven't been able to post anything. Where did the end of the year go? I still can't believe it's 2011 already. Let me tell ya, that last week before Christmas was a whirlwind for me. I was trying to finish up gifts for Isaiah's teachers and for the family. We have 4 family members with Dec. birthdays (including mine) and 3 friends. Nothing like waiting until the last minute! My husband always jokes about how I'm a huge procrastinator. But for some reason, my creative juices don't start flowing until I'm under pressure, LOL!

These were the last of the frames I made for Isaiah's teachers featuring Heartbreaker Edwin and Santa's Helper Edwin (you can read details on the frames, papers, flowers, etc. on the below posts....I used the same stuff). The flowers and poinsettias are from Prima and Recollections.

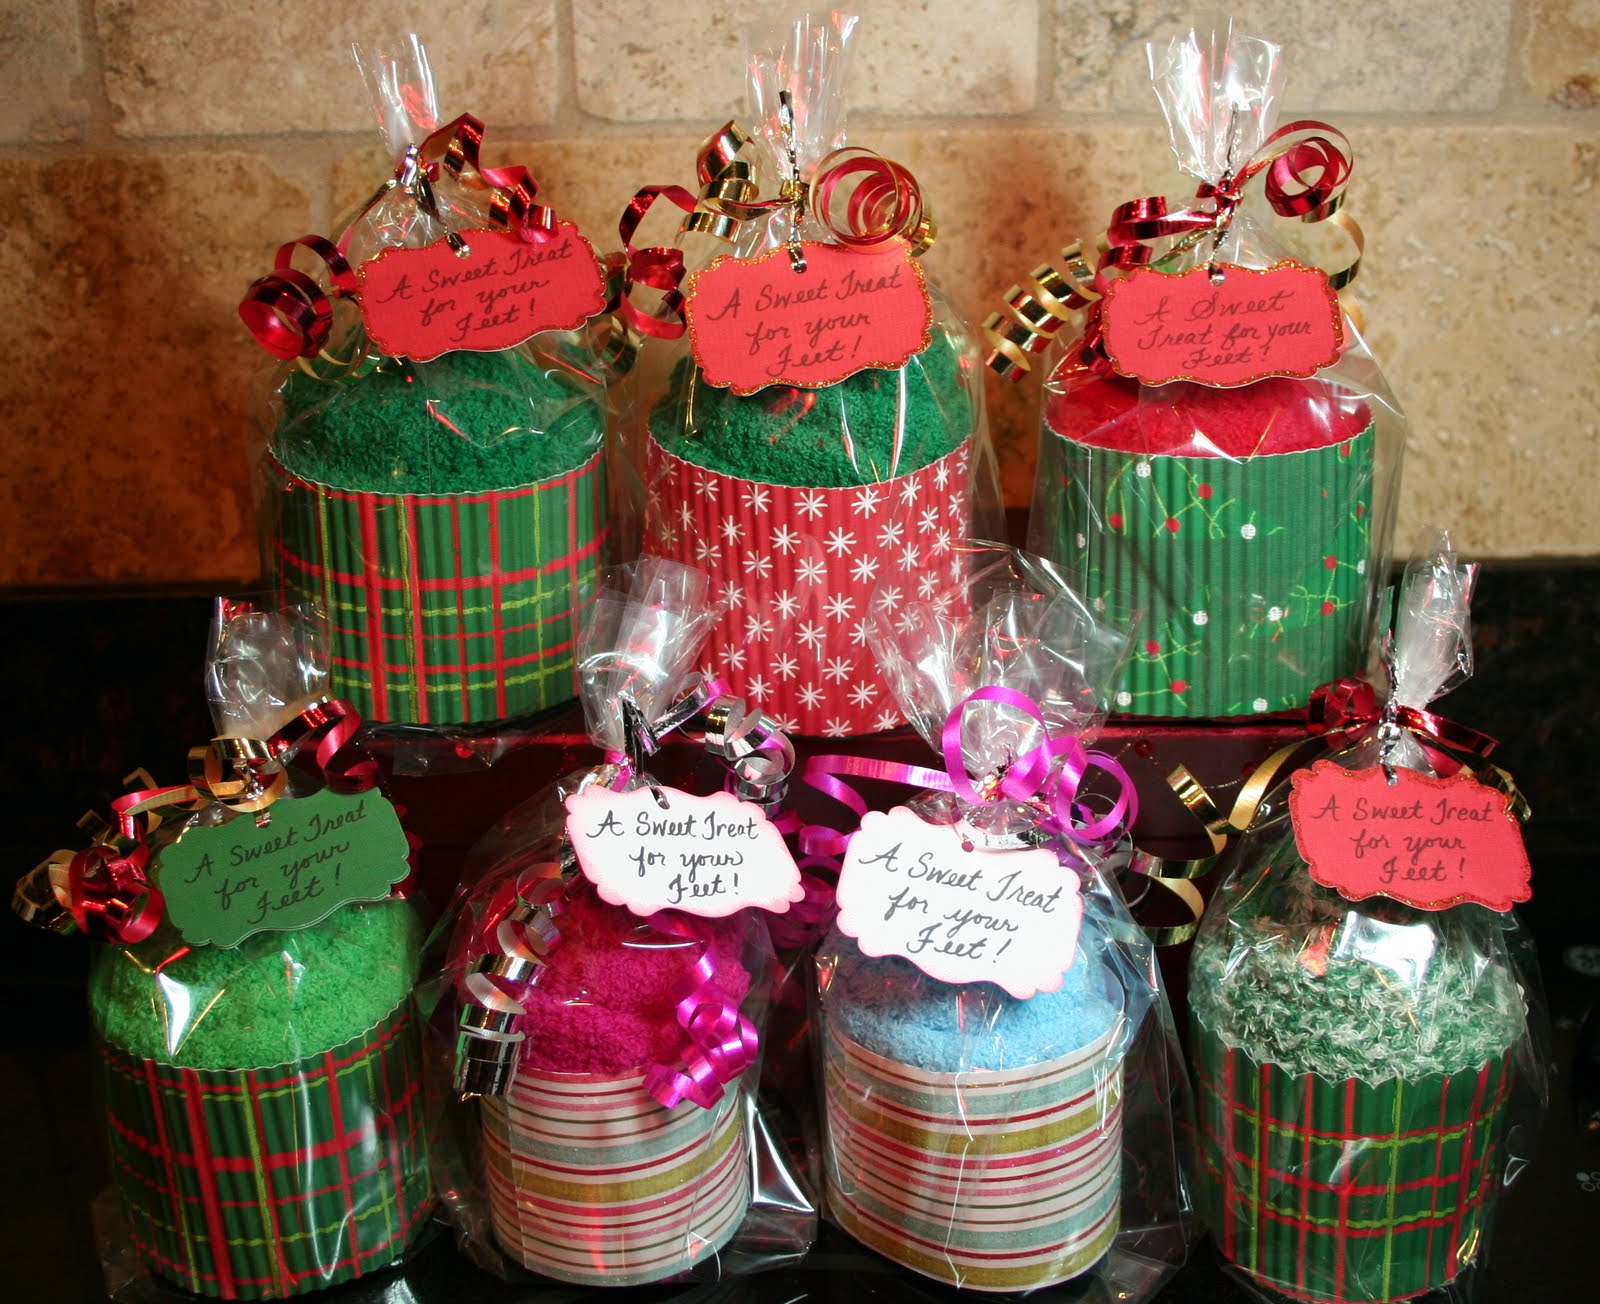
I also found an awesome tutorial for Fuzzy Sock Cupcakes here, so I made some to include with the frames for the teachers.

For Isaiah's classmates, I made Snowman Soup. The labels and ingredients for the snowman soup came from here. I soooooo wish I had the mini Snowy image from Magnolia....he would have been really cute on these packages! Next year though, he'll be on there!! I did include 2 mini candycanes in the "soup" mix, but you can't see them because they are on the backside of the package. My favorite find of the season was french vanilla snowman marshmallows...Yum!

Here are a few pictures of my mom's house. Her favorite holiday is Christmas...if you couldn't tell, haha. I'm always amazed at how she arranges all her decorations on her two trees and throughout the rooms of the house. Every year when I go home, I find she's added more to her collection. It always makes me smile to walk through her door during the holidays. The biggest bonus every year though is seeing my son's eyes light up....it's priceless. He gets so excited!

Santa in Entryway:

Staircase (at the top of the staircase is the snowman pictured above):

Carolers on the left side of formal living room:

Formal Living Room:

Christmas Tree in Family Room:

If you think the inside of her house is amazing, you should see the pics of her backyard that she landscaped with my dad's help. She designed it all and still maintains it all by herself (and she's in her 60s). I wish I had her green thumb. I can barely keep one plant alive....and let's not even talk about my flower beds, LOL!

I hope you had a great Christmas and I wish you all a fabulous and blessed new year!!

Love,
Rosemary :)

Thursday, December 23, 2010

Elisabeth Bell's BIGGEST DECEMBER BLOG CANDY!

Have you ever seen a stamp and just fell in love? I have those moments all the time (my husband would definitely agree and probably say too many times, LOL!). Right now, I'm really in love with the images from Elisabeth Bell. If you have never seen an Elisabeth Bell image, then you need to go to her blog right now....yes, I said right now and check them out. They are sooooo adorable and of course, I want them all!

I saw on Elisabeth's blog and facebook page that she has this AWESOME blog candy give-away where the winner will win 38 stamps (that's not a misprint folks....38 stamps!!). I'm in total shock!! So I spent all day working on my project (in between doing house chores and getting ready for Christmas). I just couldn't pass up this wonderful opportunity. My husband is like....what are you doing....do you have time for this? Well, if it helps me win 38 stamps......YES!!

I decided to make a frame for my mom. I needed a Christmas image and went to Elisabeth's blog to buy a digital image since I was on a time crunch. I decided to use the following image called Eden's First Christmas which you can purchase here. I just love the child-like wonder and innocence I feel when I look at her. It's how my 4-year-old son looks at our tree and ornaments.

I colored Eden with Copics and Prismacolor markers. I used Stickles all over the place....on the snowflakes on her pajamas, on her socks, on the holly leaves in her hair, on the ribbon in the tree and on the presents. I also used CTMH Liquid Glass on the ornament and lights, teddy bear eyes and nose, and on the berries in her hair. Some of you may be asking....how did you get the stickles and liquid glass in the small, tight areas? I used the pointy end of a bamboo skewer!

Her pajamas were inspired by some cute red glittery snowflake paper I found in the MME Wonderful Winter paper pack. I used the paper in two of the corners of this frame.

Most of the paper is from The Paper Studio. Some came from my stash. On the inside of the frame I embossed a green sheet of paper with Cuttlebug D'vine Swirls and then sanded it to reveal some of the white core. The wood letters came from Walmart. I covered them with several coats of Tulip Gold Glitter Dimensional Fabric Paint.

Here's a close-up of the Poinsettias:

On the large middle poinsettias, I used a Marianne Design poinsettia die (LR0122) available here to make the two large bottom leaves. The rest of the poinsettia and leaves are from Prima. I added gold stickles to the edges and then buttons to the middle.

Here are some more pictures of my frame:

I hope you enjoyed my frame! You still have time to join in on this blog candy. It ends Friday, December 24th at 8pm, Arizona time.

Thanks for looking and I hope you have a blessed Christmas and New Year!

Love,
Rosemary

Wednesday, December 15, 2010

Tilda Word Frames

Yesterday (Dec. 14th) was my bday, so my hubby and 4-year-old son took me out to dinner (the big party with the family is this Saturday). December is a crazy month for us. My husband's bday was Dec. 1st. His two brothers have bdays this month along with several friends. And then there's Christmas! YIKES!! I told the hubbie, we can't have anymore friends with December birthdays, LOL!

After dinner, my husband played with our son so I could finish up some projects. My son, Isaiah, has his first Preschool Christmas program on Friday, followed by a Christmas Party. Friday is also the last day of school so I'm on a time crunch to finish up his teachers' gifts.

I saw on the Close To My Heart bulletin board some awesome frame ideas by Beckie Lehman. I knew immediately I wanted to do something similar for his teachers' gifts. I found these cheap, cheap dollar frames from Michaels last year and bought several because I knew I would use them eventually. They are unfinished, wood frames with no glass in the center. I checked this year and it looks like they still carry them, however they've gone up in price to $1.50 (still can't beat that deal!).

I'm also making a few other things to go in the teachers' bags that I'll post later....along with Snowman Soup packets for his 20 classmates!

Here are the pics of my two Word Frames:

Here is the first frame using Gift Tilda:

The flowers are made from silk ribbon. I cut the silk ribbon into different sized circles and then held the edges next to a candle flame to melt them. If you do a search for burnt edge silk flowers, you'll come across a bunch of tutorials. Then I glued each circle in the middle with Fabri-Tac and topped it with a button.

The word JOY is made from 1.25" wood letters I found at Walmart made by Plaid. I covered them with two coats of Gold Tulip Glitter Dimensional Fabric Paint. The green paper (Paper Studio) behind the word Joy is embossed with Cuttlebug D'vine Swirl. I then took CTMH White Daisy ink and rubbed it across the top to bring out the embossing.

I colored Tilda with Copics and Prismacolor Markers. All of my shading on her face and clothes was done with chalk. I then added Star Dust Stickles to parts of her dress, on her bows, and on some of the presents.

Here's my second frame using Violin Tilda:

It's hard to tell from the photos, but I added gold stickles to her wings and the violin bow. I also added Star Dust Stickles to the white areas of her dress. I then added CTMH Liquid Glass to her violin and shoes to make them shiny (didn't show up very well in the photos).

I'm entering the following challenges:

Bunny Zoe's Crafts - Sparkle & Shine
Creative Inspirations Challenge - Anything Goes Christmas
Magnolia-licious Highlites - Letter or Word Project using Magnolia Stamps
Stamp with Fun - Christmas

Well, that's all for tonight folks. I'm ready to go hit the sack....it's been a long day! I still can't believe Christmas is next week!! I had huge plans this year to make my own Christmas cards and lots of homemade projects, but I never seemed to find the time to get it all done. So, unfortunately, it looks like I'll be buying cards again this year. My hope is to be more involved in challenges next year and get a head start on Christmas cards so I'm not running around like a chicken with it's head cut off in December!

Thank you for taking the time to visit me! It really means a lot!!

Rosemary :)