Thursday, May 19, 2011

CropStop Challenge #20: Tic, Toc, Tic, Toc

This week's CropStop Challenge is to make an ATC using "Time" as the theme. ATC's are 2 1/2 x 3 1/2 inch trading cards to be "swapped" with your crafting friends! We want to see you "make the time" to create one too! Be sure to check out the blog for wonderful examples from my Creative Team Sisters!!

Remember...CropStop is highlighting Copic markers for the entire month of May. Use Copic markers on your projects during the month and CropStop will randomly select one winner from the month's total entries to receive a great Copic Prize Package!

Don't have Copics? Not to worry, use your coloring options...pencils, water markers, chalks, and still be eligible to win a $15 Gift Certificate during the random weekly draw! Always remember to check our Guidelines under the "RULES" tab on the left to ensure you are eligible for the prizes.

Also, be sure to check the blog on Mondays for Michelle's Monday Copic Tutorials. Michelle is a Certified Copic Designer and has some fabulous tips for all of us Copic users. If you've missed them, click on the links below to take you to the previous postings.

http://cropstop.blogspot.com/2011/05/michelles-monday-copic-tutorial.html

http://cropstop.blogspot.com/2011/05/monday-with-michelle_09.html

http://cropstop.blogspot.com/2011/05/monday-with-michelle.html

http://cropstop.blogspot.com/2011/04/copic-mini-monday.html

http://cropstop.blogspot.com/2011/04/copic-monday.html

http://cropstop.blogspot.com/2011/04/copic-colors.html

http://cropstop.blogspot.com/2011/04/copic-color.html

I hope this gives you plenty of inspiration to pull out your coloring mediums and join us this month as we celebrate coloring with Copics. You can use any coloring medium for our challenges, but if you use Copics you'll go into a separate drawing for a Copic prize!

I'll be back soon with some projects I've been working on. Also, I have some BIG NEWS to announce next week....so stay tuned!

Hugs,
Rosie :)
Photobucket

Saturday, May 7, 2011

La-La Land Crafts National Scrapbooking Day Contest

La-La Land Crafts is having a contest for National Scrapbooking Day. It ends today so I was scrambling trying to get it done before the deadline! You can see the details of the contest on their blog here. They are also doing a Design Team call!! If you love their stamps then you should head on over to their blog and apply. The benefits sound amazing!

For the National Scrapbooking Day Contest, they wanted to see a creation using their stamps in a project other than a card. They are looking for different projects including scrapbooking layouts, decorative items, altered items, 3D projects, etc.

They will pick THREE winners for this Contest!!!
1st Place - $50 credit to our store
2nd Place - $25 credit
and 3rd place - $10 credit
This Contest will run through May 7th. They will announce the winners on May 9th.

For my project I made a Stationery Box with a matching birthday card. I found this AWESOME tutorial by Jackie on Splitcoaststampers for this amazing Stationery Box. There are a lot of steps and it's a little time consuming, but I think the end result is fabulous....don't you agree?


For my image, I used my digital stamp of Birthday Marci. Isn't she the cutest thing ever?! I love the Marci and Luka line! They are so easy to color and I think their faces and outfits are adorable. You can find the entire Marci and Luka collection in rubber here.

I colored her in Copics and did most of my shading in chalk. She has Stardust Stickles on all the orange parts. Actually, there's quite a bit of stickles all over the card. I added it to all the Wild Orchid Crafts flowers and around the edges of the sentiment.

The paper is from CTMH Splendor paper pack. I used my Classic Ovals Large Nesties and Classic Scalloped Ovals Large Nesties behind Marci. The white oval is embossed with Cuttlebug Swiss Dots. The gorgeoous sheer Navy ruffle edge ribbon is from CropStop here. I used my Bow Easy to make a double loop bow. Love that thing!! The lace came from WOC.

The sentiment is from Inkadinkado and is matted on Spellbinders Fancy Tags. The crystal sprigs on the left came from the blog candy I won from Patricia Garcia. Thanks girl....they are amazing!! I need to find out where she got those!! The other crystal garland on the right came from Hobby Lobby. Here's a side view so you can see the dimension. I have Marci and the sentiment raised up on popdots.

Now, here's the amazing Stationery Box. I LOVE this thing!! It has a place for some large square cards (5 x 5), tags, 3x3 mini cards, post-it notes, mail stamps and a matching ink pen. Everything a person needs to write a nice little letter.....remember those days when we used to sit down and write a letter to someone?!?! I'm not so great at doing that, especially when there's email and Facebook, but I think I will sit down this week and write some letters to my family members in Michigan!

Here's a close-up of the middle section with the tag and 3x3 card taken out of the holder. I used the same digital image and just re-sized her smaller to fit on the mini card.

And, a closeup of the 3x3 mini card and tag:

I hope you enjoyed my Stationery Box Set. It was a lot of fun to make! Now....go check out these amazing stamps from La-La Land Crafts and get some for your stash. I promise you will love coloring them!

Have a great weekend!

Hugs,
Rosie :)

Tuesday, May 3, 2011

Magnolia-licious May Sketch Challenge & Announcements

Hi Y'all! How has everyone been this week? It's late Tuesday night and my little one is in bed finally. He's been sick the past couple of days with a fever so we stayed home from school. He's prone to febrile seizures so when he gets sick it's always a little stressful. I think his body is finally at the point to handle the quick spikes in temperature, but it's still scary when his temp jumps to 102. To say the least, we are up every 4 hours giving him meds just to make sure.

Anyways, since we've been hanging at home these past couple of days, I managed to make a card for the Magnolia-licious Highlites May Sketch challenge. Keep reading to the bottom of my post if you have time because I've announced the winner of my Spellbinder Candy from last week and I've got some CropStop news for ya. :)

Here's Suzanne's amazing sketch:
Here's my card using Tilda with Birdcage:

I actually made the birdcage last week for CropStop's Nightingale challenge. You still have until Wednesday night to enter. All you have to do is make a project using a textured bird, birdcage, and/or bird's nest on your project. If you want to know how to make the birdcage, then click here go to my previous post.

This week though, I was inspired by the Magnolia-licious sketch to make a matching card using Tilda with birdcage.

I used Copic E50 to color her skin and then did all the shading and cheek color with chalk. For her hair I used E37, E25 & E55. Her socks are B00. Her clothes are all paper-pieced and shaded with some black chalk. I added Stardust Stickles to the green paper on her dress and bow. Her shoes are covered in CTMH Liquid Glass to give them that patent leather shine. I like the CTMH Liquid Glass much better than Glossy Accents. It's thicker and comes out slower so I have more control especially in smaller areas. I can make some pretty high dew drops/spots with the CTMH Liquid Glass because of its thickness. Believe me, if you try it you will love it!!

I used the same papers as my birdcage from DCWV Nana's Nursery Baby Boy paper pack. The green paper came from my stash. All dps are edged with Stardust Stickles. I used my Spellbinders Classic Scalloped Oval Large to cut the white cardstock behind Tilda. Then embossed it with Cuttlebug Swiss Dots. I inked the scalloped edges with Broken China Distress Ink. Behind the white scalloped paper is a circle paper doily. It was originally white, but I rubbed blue chalk all over it to color it.

The large, blue roses are from Recollections and the white cherry blossoms are from Wild Orchid Crafts. I covered all the flowers with more Stardust Stickles. I used the Martha Stewart Blossom Trim deep edge trimmer for my middle trim piece. I cut one border in green and another border in white. I cut out the flowers on the white trim and used my McGill flower making tools to curl the flowers up. They were edged in Broken China ink and Stardust Stickles. The center blue pearls are from Jolee's.

The butterflies were made from the Martha Stewart Monarch Butterflies deep edge trimmer. I punched the border and then cut out some of the butterflies to get the various sizes. The edges were inked with Broken China and covered in Stardust Stickles. Small Recollection pearls were added to the butterfly centers. I added rhinestone swirls from my stash (I think they were also from Recollections). The metal looking corners were cut from some metallic paper I had in my stash using Cuttlebug Vintage Corners.

Here's a side view so you can see the dimension. I raised Tilda on pop-dots.

I really loved how this card turned out. It actually came together pretty quickly for me (usually it takes me at least a week to make one card, LOL!). I know having the great sketch to get me going was really the key. I definitely need to do more sketch challenges!

Now on to my Spellbinder Candy winner. Sorry I didn't get it up earlier. We've been having internet issues and I haven't been able to load pictures to my blog from home. They finally got it fixed this week....YIPPEE!!

KELLY NEIS....you are the winner of my Spellbinder Candy!!

Here's a picture of your winnings: Deckled Rectangles Large & Eyelets Pendants. (the little boy is excluded, LOL!) If you already have these dies let me know and I can try to switch them out.

Now, the joys of having a little boy....can you guess what he is doing that he wanted me to take a picture of???

Yeah, he's burping! I'm telling ya, having a boy can be interesting!

Before I go, I wanted to let you know that CropStop is highlighting Copics for the month of May. Look for great Copic Tutorials by Creative Team member and Certified Copic Designer, Michelle Pearson, every Monday in May. She will be sharing her Copic talent with you.

At the end of May, CropStop will randomly draw one winner from all challenge entries during the month of May to win this grandiose prize...a collection of the 12 new Copic colors and lots of other goodies!

Have a happy hump day and I hope you enjoy the rest of your week. I'll be back soon to share a Name Frame I made for Isaiah's teacher.

Happy Crafting!
Rosie :)
Photobucket

Thursday, April 28, 2011

CropStop Challenge #17-Nightingale (Bird Theme)

Happy Thursday everyone! It's time for CropStop Challenge #17-Nightingale Theme. Florence Nightingale's birthday is in May so to celebrate we want you to use a textured bird, birdcage, and/or bird's nest on your project. Since it's the end of the month, I decided to make two projects. One was actually started a while ago....I just had to finish it up. So, truth be told, I actually didn't start from scratch on both...for me that's close to impossible, LOL!

My two projects are a Paper Birdcage and a Peacock Easel Card Drawer Box:

I saw this awesome paper birdcage on the back page of my April 2011 Scrapbooks Etc. magazine and thought it would be perfect for this challenge. It listed the designer as Laurie Cinotto. Her blog is http://www.lalalaurie.com. I couldn't find any instructions on her blog so I made up my own dimensions.

Here are my measurements:

Base Piece: 3 1/2" x 12".
It definitely helps to start off with a thick piece of designer paper that has a pattern on both sides. The beautiful paper I used came from DCWV Nana's Nursery Baby Boy pack. Unfortunately, it was white on the back so I had to cut a second piece of dp (the blue/white striped paper) to cover the inside.

Strips for the cage: 1/4' x 7".
I cut 12 strips total. Once you cut all your strips, pierce one end of each strip about 1/2" down from the top to make a little hole for a brad (or in my case nail....keep reading). You also want to use a thicker weight dp with a pattern on both sides for the strips. If you try to glue two thick dp's together to make your strips, it becomes too thick to slide a brad through at the top of the strips. Yeah, I learned that the hard way! So instead of a brad, I had to use a nail to go through all my layers. I just added glue to each strip as I inserted the nail through so it would all stick together.

You will want to glue the bottom of your strips to the inside of your base piece about 1/2" down from the top. I used 12 strips and spaced them a little less than 1 inch apart. Don't forget you will have to overlap your base piece to glue it into a cylinder so don't glue your strips too close to the left and right edges. Then cover the strips with your second designer paper base (if you're using one).

Once that is dry, glue the ends of the base together to form your cylinder and let dry. Now, you want to take a brad and insert it through the holes of each strip to form the cage. To layer my strips I started on one side and then grabbed the strip directly across from the one I started with to go underneath. Then I grabbed the strip to the left and then the one directly across from that one. I hope that makes sense. Once you secure the brad through all the layers, squish down the strips from the top so it pushes them outwards a little.

You will then want to make a bird using a stamp or die-cut. I used a CTMH bird stamp from the Sophia Workshop on the Go (B1379). I stamped the bird, then enlarged it 200% on the copier to get my template. I traced the bird twice onto some spotted dp from DCWV Nana's Nursery. The dp had yellow, green & blue dots and glitter on it, but the background was white. I took some green and blue chalk and covered up all the white. I glued my yarn between my bird layers, then went around the edges with Broken China Distress Ink and Stardust Stickles. I added Jolee's Blue Pearls for the eyes (one on each side). To make his wings, I took apart a fabric Recollection flower and squished the petals together and glued a wing to each side.

Now you insert your bird through the bottom of the cage and wrap your string around the brad on the inside of the cage. Make sure you use some glue to secure the string. Since I had to use a nail, I covered the bottom of the nail with glue, and starting from the bottom I wrapped it upwards around the nail.

For the base, I used the Martha Stewart Blossom Trim Deep Edger and punched the border from green dp. I adhered the green dp border and then punched another blossom border from white cardstock. I cut out all the white flowers, and then used my McGill flower making tool (with the ball at the end) to make them curl up. I attached my flowers first and then added Jolee's Blue Pearls to each center.

For the sentiment, I punched out the small Spellbinder Fleur de Lis Pendant from shiny, bronze paper (my stash). I also punched out a 1 7/16" circle to go on top. Then I stamped the circle border and sentiment from Fiskars Wishes All Around stamp set using Broken China Distress Ink. I added Stardust Stickles around all the edges. I used pop-dots behind the sentiment piece and behind the Fleur de Lis Pendant to give it some added dimension.

I glued a blue fabric Recollection flower to the top. I added a Wild Orchid Craft white rose to the middle of the blue flower. All the edges of the fabric flower and rose are covered in Stardust Stickles.

Here's the back view:
You can see the flower border goes all the way around and the bird is the same on the reverse side.

My next project is a Peacock Easel Card Drawer Box:

The paper is from CTMH Magnifique Level 2 (X7127B). The peacock and peacock feathers are from CTMH Circle of Love stamp set (D1438). The sentiment is from CTMH The Present stamp set (D1436).

I used Spellbinders Labels One to cut out the sentiment, and inked around the edges with Vintage Photo Distress Ink. I sponged blue and green ink onto the peacock stamp, "huffed"on the stamp to moisten the ink and then stamped on white cardstock. I smeared blue and green chalk over and around the image before I cut it out so no white was showing. I added Stardust Stickles and blue rhinestones to certain areas of the peacock. The sheer brown, ruffle-edge ribbon came from CropStop. The white rose is from Wild Orchid Crafts. I added white CTMH pearls to the corners.

I punched the bottom sentiment area with EK Success Real Estate Sign punch. The edges are inked with Vintage Photo Distress Ink. The chocolate pearls are from CTMH. I painted the wooden knob with blue acrylic paint and glued it to the front of the drawer using my favorite glue---FABRI-TAC. It's awesome and holds extremely well. It's like hot glue in a bottle!

Here's another view with the drawer open:

I hope you enjoyed my projects. I can't remember who's tutorial I used for the drawer box. If you do a google search for Easel Card Drawer Box I'm sure several tutorials will pop up. :)

Thanks for joining me this month for our Spellbinders Tribute to my CropStop team member Gloria who made their Design Team. We hope you join our challenge at CropStop this week and remember, if you use a Spellbinder product be sure to mention it in your post so you can be eligible for CropStop's second drawing!

Sending hugs your way!
Rosie :)

Friday, April 15, 2011

Easter DIORAMA for the Magnolia-licious Easter-Spring Extravaganza Contest

I am FINALLY finished with my Easter Diorama for the Magnolia-licious Easter-Spring Extravaganza Contest-Category 3 Anything but a Card (click on the link to see the different categories and rules). It's been in the making for several weeks now. I've actually had a DIORAMA idea in my head for a while (since Christmas) and have wanted to make one. Did you ever have to make one in elementary school?? Apparently, it's a popular project that teachers assign, and you can find some really awesome ideas on-line. They even have kits at various craft stores. I bought a Diorama kit, but ended up not using it. I was going to try to make some realistic-looking foliage, bushes, trees, etc., but the colors didn't really match. I'll save it for a future project. I'm sure I'll use it for something. :)

I started my Diorama project with a white Coach shoe box and painted the outside with FolkArt Fresh Foliage Acrylic Paint. Then I covered the outside with Easter Polka Dot dp from The Paper Studio. Let me tell you.....to save time, it's probably a better idea to start with a photo box/shoe box that is already nicely decorated on the outside. I don't know why I didn't think of that before I started my project, LOL! It took me forever to paint and cover the outside of that box!

On the inside of the shoe box, I painted the top half with FolkArt Deep Ocean Blue Acrylic Paint and the bottom half with FolkArt Fresh Foliage Acrylic Paint. I used the Sheep dp from American Traditional Designs Welcome Baby Boy paper pack and created the background scene. I cut the clouds out from a sheet of paper in the same pack. The grass dp is Creative Imaginations John Deere that I got from my local scrapbook store.

Creating the scene for the Diorama was pretty easy. The hard part was coloring all those Tilda and Edwin images.....22 TOTAL!! (pic only shows 20) It took me forever to color and embellish each one! Since I used stickles, flower soft, and glossy accents on pretty much everything, I also had to factor in drying time. You can purchase these cutie patootie images from Diana at Magnolia-licious.

To further complicate things, I decided to make some of my images into standing paper dolls. I cut thin aluminum siding into strips and glue them to the back of my images. Everything on the inside of the box is glued down. All the images on the top of the box and on the outside of the box are movable. There is a magnet sheet under the dp on the top of the box and under the grass dp on the box lid, and there are little magnets on the bottom of each movable image.

Here's a picture of the entire Easter Diorama put together:

I hope you enjoy viewing the tons of pictures that are about to follow....grab a cup of coffee/tea first because you may be here for a little while, LOL! When I finally finished it, my little boy said, "Oooooh Momma, it's booootiful! Can I have it?" Ummmmm........(thinking of good excuse)....well baby, this is for someone else, but I'll make you something to play with that has Batman and Robin....haha! (Now, I've got to get that Cricut cartridge!) It did make my heart feel good that he and the hubby loved it!

Here we go! You can click on the pictures for a larger view.
Inside of shoe box:

Close up of left inside:

I glued little mini eggs to the inside of the wooden wheelbarrow. All the wooden chairs/benches came from the miniature doll area of Hobby Lobby. The yellow fuzzy chicks came from the Easter craft section of Hobby Lobby. The little mini chick & green grass are Easter buttons. I clipped of the back of the button loop and glued the little mini chick to the grass. The tulips and watering can are also buttons.

Closeup of right inside:

There is a basket of larger, glittered eggs behind Dreamy Tilda. The bunnies also came from the miniature doll area of Hobby Lobby. The yellow butterfly on the basket handle is a button as well as the little purple flowers at Edwin's feet.

Scene on top of the shoe box:

The metal flower sign came from the Easter section of Hobby Lobby. I added a Happy Easter sticker to the sign and glued Tilda to the front. The bench on the left is made up of two smaller benches glued together. The bent aluminum siding strips behind the Tildas and Edwins allow them to stand up. The magnets underneath the siding strips just offer more stability.

Close-up of paper doll Tilda's on left side of shoe box:

Close-up of paper doll Tilda's on right side of shoe box:

Top angle view of Diorama:

Voting will start April 20th and go until April 27th. I've seen some of the projects already linked and man, oh man, are they fabulous!! I know this is going to be a really tough contest to vote on. I do pray though, that some of you will vote for me. :)

Sending big hugs your way and good luck to everyone! Thanks Diana for this awesome contest!

Rosie :)

Thursday, April 14, 2011

CropStop Challenge #15-Vintage

Happy Thursday everyone! One more day and it's Friday, woo hoo! It's been a busy month for me so far. I've been busy working on my Magnolia-licious Easter-Spring Extravaganza Contest project on and off for weeks now. I'm so glad it is finally done! April is also my month to post projects for CropStop. And, I've got my nephew's birthday, Easter, and a baby shower....like I said...busy month, whew!

This week's challenge at CropStop is to make something with a vintage feel. I've never made anything "vintage" so this was definitely a challenge for me. But, if we don't challenge ourselves we never get better and we never get to experience new things....right?! I have to say, I was intimidated at first. But, after I got started I felt like things started to flow. In the end, I'm really pleased with the results! I have to say this might be one of my favorite cards so far! :)

I think the hardest part for me was finding the right papers. I searched my stash and couldn't find anything that wasn't bright. Then I remembered I recently placed a CTMH order. One of their new paper packs called Bliss had that vintage feel. The colors are soft--Vanilla Cream, Colonial White, Grey Flannel, and Chocolate....PERFECT (makes me want some ice cream now, LOL)! I definitely need to order more.

I received a new order from Diana at Magnolia-licious and decided that Ribbon Hair Tilda would be great on my vintage card. I stamped Tilda in Memento Rich Cocoa and colored her with Copics, Colorless Blender, and chalk. I tried to keep the colors soft so I took my lighter color Copics to color in the large areas. Then I did the Copic tip-to-tip technique where I picked up a darker color with my lighter color to add the shading. I used chalk around her face and on her cheeks.

Here's my Vintage Card (click on picture for larger view):

I distressed all the edges of my papers with scissors and then rubbed Antique Linen Distress Ink & Walnut Stain Distress Ink around them. I've never sewed on cards before so I went the easy route and just used a brown Sharpie to make stitch marks....easy peasy and less intimidating! I used Spellbinders Blossom Nesties behind Tilda and Spellbinders Fancy Tags for the sentiment. The sentiment is from Fiskars Cameo Ovations.

The Guipure White Lace is from Wild Orchid Crafts. It was originally a bright white and I needed something more cream. So I brewed some tea, soaked it for a few minutes and then let it air dry. The pearl swirls and light blue ceramic roses are from Recollections at Michaels.

Side view:
I'm entering my card into the following challenges:

Deb's Creations - Distressing
Simon Says Stamp and Show - Distressing
Stamptacular Sunday Challenge - Girls & Swirls

I hope you enter our CropStop Vintage Challenge this week. Don't forget, if you also use a Spellbinder Die on your project you will be entered into a separate drawing for a Spellbinder prize, Woo Hoo! And, if you need any product remember to use the discount code on my sidebar to receive an additional 10% off your order at CropStop.

Have a great weekend! See you next Thursday for another challenge and BLOG CANDY, Yippee!!

Big hugs to you all!
Rosie :)
Photobucket

Thursday, April 7, 2011

April is Spellbinder Highlight Month at CropStop!

The CropStop Challenge Blog will be challenging you, beginning Thursday, April 7th, to use those fabulous Spellbinder dies on your creations! The CropStop Challenge Sketch will have an added "plus"! You will have two options with the challenge....create a project with the sketch and be eligible for the CropStop Gift Certificate Prize, or create a project with the sketch, "plus" use a Spellbinder die for the opportunity to also win a Spellbinder Die Prize!

You will definitely want to check out my fellow DT sisters' blogs throughout the month of April because several of us will be offering blog candy! I'll be offering my blog candy on April 21st, so make sure you check back!!

Here is the sketch challenge for this week:

Here's my card:

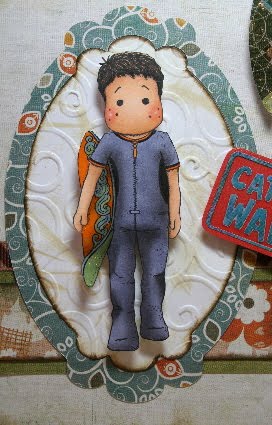
All of the paper came from the awesome 6x6 BasicGrey Pyrus paper pad that I got from my wonderful friend Chris....thank you so much dear!! I think they fit perfectly with my Surfer Edwin! :) The surfboards at the top were cut from the same paper pack. I topped them with Glossy Accents to give them that shine. All the surfboards are raised on pop-dots for added dimension.

For my Spellbinder Die, I used Labels 10. I smudged Old Paper Distress Ink over the white mat behind Edwin, then embossed it with Cuttlebug D'vine Swirl Embossing Folder. The edges of the paper were distressed with Walnut Stain Distress Ink. The sentiment is a sticker (Creative Imaginations) that I backed with orange cardstock and raised up on pop-dots. The ribbon is from my stash.

I colored Edwin with my Copics and did all my shading with chalk. I'm still building up my Copic stash and don't have all the colors to do shading. Although it takes longer to color with chalk, I like that it can be erased if I get chalk in the wrong area or if I make the shading too dark. I added Glossy Accents to Edwin's surfboard and raised him on pop-dots.

Here's a side view:

Thanks for stopping by and checking out my Edwin card! I appreciate all your wonderful comments!! Just FYI, this is my month to post projects for CropStop so I'll have a new post up every week this month. See you all soon! Don't forget to use my 10% discount code on my sidebar when you place an order with CropStop for an additional 10% off.

Hugs,
Rosie :)
Photobucket