Sunday, March 31, 2019

I Am Roses + Conie Fong Angel Wishes

Happy Sunday everyone! Today, my card features the beautiful flowers from I Am Roses with Conie Fong's Angel Wishes. I absolutely LOVE this gorgeous image! She is stunning, especially surrounded by the fabulous IAR flowers.
 
 Copics:
Skin: E000, E00, E01, E02, E11
Hair: C1, C7, Black
Pink: R81, R83, R85
White: C1, C2, C3, Colorless Blender 
Yellow: Y13, Y18
Purple: V12, V15, V17
Green YG67, YG23
Pink flowers: RV04, RV06, RV09
 
The decorative oval frame is from Spellbinders. I used some paper and ribbon in my stash. I also raised the cute angel on foam tape for extra dimension.
 
 
Don't forget you still have until April 8th to enter the current I Am Roses Challenge!! You must use at least 2 products from I Am Roses on your entry. The best part is that there are 4 prizes up for grabs!! Don't miss out on your chance to win these stunning paper flowers!
 
Hugs, 
Rosie

Friday, March 29, 2019

C.C. Designs: NURSE SUE

Happy Friday everyone! I hope you had an awesome week! I'm back today to share a Get Well card using NURSE SUE from C.C. Designs. I realized after going through my card stash that I don't have any Get Well cards......shocking right?! This stamp is definitely a good one to have as part of your stamp collection! I will definitely be using it for various occasions. Head over to the C.C. Designs Store to pick up yours today. Be sure to use my code ROSEB46 at checkout for extra savings! :) 
 
 Copics:
Skin: E000, E00, E01, E02, E11, E15
Hair: E42, E47, E49
Pink: R81, R83, R85
White: C1, C2, C3, Colorless Blender 
 
The heart paper is from an older C.C. Designs paper pad. I used sticker letters for the "get will soon" sentiment. For added dimension, I raised Nurse Sue on foam tape. 
 
 
 Grab all your favorites in the C.C. Designs Store today using code: ROSEB46 at checkout. You're going to have so much fun coloring these amazing stamps!
 
Have an fabulous weekend friends!
Rosie

Tuesday, March 26, 2019

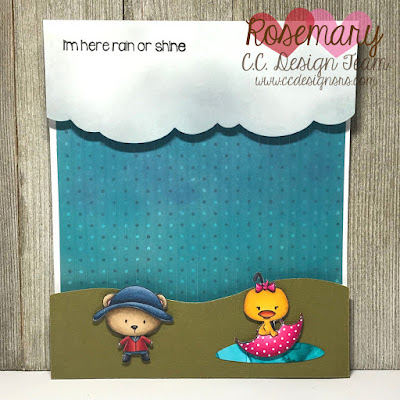
C.C. Designs: April & May Rain Shaker Card Tutorial

Happy Tuesday everyone! Today, I'm sharing written instructions on how I created this cute Rain Shaker Card inspired by Laura Dovalo Rasi.


Step 1: First, I gathered up the supplies I needed to make the card and colored my paper and images.
SUPPLIES: April & May Clear Stamps, In and Out Square Metal Die, Cloud and Grass Die, Distress Oxide Inks, Foam Tape, Glass Beads, Clear Thread, Scor-Tape.
I colored the ducks from the April & May Clear Stamp Set. The rain hat on the standing duck was cut out from the bear stamp. I used the Cloud and Grass Die to create the cloud panel, grassy knoll, and waves, and then colored them using Distress Oxide Inks.


Step 2: I cut out a square scallop frame, and glued the cloud panel to the top and the grass and waves to the bottom. If you want to add a sentiment to the cloud portion, now is the time to stamp it (don't wait until after you put the card together because mounting it on foam doesn't give you the hard surface you need to get a clean stamp).


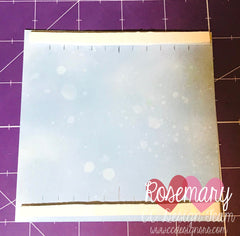
Step 3-4: The foam tape I was using is kind of thin so I cut an 8 ¼” strip and folded it in half on top of itself to make a thicker 4" foam strip. I had to repeat this step a few times.

Step 5: I then cut the layered 4" foam strips in half lengthwise.

Step 6: I also cut one of the strips in half again to make a really thin strip.

Step 7: Now it’s time to measure where the thread will go. The blue, background square is 4 ½” x 4 ½”. I first measured to find the center and drew a little line in pencil. Next, I measured out 5/8 from the center on both sides to get the next marks. You want to leave a border on the edges to allow for more foam tape. You also want to put your pencil marks above where your foam tape will go so you can still see them as guides.

Step 8: Place your foam tape at the top and bottom, but leave a little bit of space between the top and bottom of the paper. In other words, do not line the foam tape at the edge of the paper.

Step 9: Line up the clear, transparent thread with the first pencil mark. Press the thread down onto the foam tape using the backing paper to press the thread into the foam.

Step 10-11: Load up about 10 beads on the thread and press the end of the thread onto the bottom foam tape. Continue all the way across.


Step 12: Trim off the hanging pieces of clear thread from the top and bottom. Grab your Scor-Tape and more foam tape.

Step 13: Cut scor-tape the same size as the top and bottom foam strips. Place on top of the foam to better secure the thread to the foam.

Step 14: Cut another strip of foam tape 8 ¼” long and fold in half. Cut the 4” strip of foam tape in half lengthwise, and place on top of the top and bottom border of foam. You will now have a double layer of foam on the top and bottom with your clear thread sandwiched between.

Step 15: Do the same to make your side borders of foam. To get thinner strips of foam to go between the lines of beads cut the strip that you cut in half in half again. Tap your embossing buddy along the edges of the foam so the beads don’t stick.

Step 16: Remove the foam tape and lay the scalloped border scene on top. Next, add your ducks on top of thin foam strips placed between some of the bead lines.

Step17-18: To finish off the card I stamped a sentiment on the cloud portion (it's better to stamp the sentiment before adhering the card together). I then glued it to a 5 ½" x 5 ½" card base with yellow, striped pattern paper. When you shake the card, the beads fall like it’s raining.

Enjoy!!
Rosie

Tuesday, March 19, 2019

The Greeting Farm Stamp Feature: GO FOR IT ANYA!


Happy Wednesday everyone! The Greeting Farm introduced 3 NEW Stamp Sets in the Store on March 15th, and they are awesome once again! 
 
The first set is called LIVE.LOVE.EAT, and features the cutest little girls and kawaii FOOD. Next, there is GO FOR IT ANYA. Talk about inspiring you to get up and get it! Finally, there is GRADUATION. Imagine your recipient's joyful expression when he/she receives a card featuring these cuties.
 
 
Today, I'm showcasing GO FOR IT ANYA. This awesome girl is definitely inspiring me to get up and get healthy!
 
 Copics:
Skin: E000, E00, E01, E11, E15
Hair: E42, E47, E49
Teal: BG10, BG13, BG15, BG78
Black: C5, C6, C7, C9
 
I used some decorative papers from Pebbles Inc. Girl Squad 6x6 Paper Pad. They fit perfectly with this stamp! I raised her on foam tape for extra dimension. The corner border die is and older one from Whimsy Stamps.
 
 
Be sure to head over to The Greeting Farm Store to grab your favorites! You're going to LOVE them all!
 
Hugs,
Rosie

Sunday, March 17, 2019

The Greeting Farm Stamp Feature: LIVE.LOVE.EAT!


Happy Monday everyone The Greeting Farm introduced 3 NEW Stamp Sets in the Store on March 15th, and they are awesome once again! 
 
The first set is called LIVE.LOVE.EAT, and features the cutest little girls and kawaii FOOD. Next, there is GO FOR IT ANYA. Talk about inspiring you to get up and get it! Finally, there is GRADUATION. Imagine your recipient's joyful expression when he/she receives a card featuring these cuties.
 
To celebrate the release, there is a short BLOG HOP, where 1 person will win the entire release. But HURRY, because you only have a few more hours to participate!
 
Today, I'm showcasing LIVE.LOVE.EAT. You really can't get any better than cute girls and FOOD for those fabulous planner pages and cards!
 
Copics:
Skin: E000, E00, E01, E11, E15
Hair: E42, E47, E49
Yellow: Y08, YR21, YR24, E35
Pink: RV02, RV04, RV06, RV09
Teal: BG10, BG13, BG15, BG78
Green: YG23, YG67
 
I cut the scallop border with a MFT Die from Xpress It Blending Card. Next, I stamped some of the kawaii food and the word YUM to make a border. After coloring in the food with Copic Markers, I then took YG23 and colored in the background.
 
 
I added yellow/white twine  to the rop with a bow, and raised the scallop panel on foam tape for added dimension. 
 
 
Be sure to head over to The Greeting Farm Store to grab your favorites! You're going to LOVE them all!
 
Hugs,
Rosie

Friday, March 15, 2019

I Am Roses MARCH Challenge: ANYTHING GOES!

It's The 15th of the month so you know what that means....a new ANYTHING GOES Challenge! The rules are still the same, and we have 4 prizes up for grabs! 
Here is the breakdown:
WINNER (Chosen at Random) $50 Voucher
Top 3 (1st Place) $30 Voucher
Top 3 (2nd/3rd Place) $25 Voucher

Isn't it fantastic!! If that's not motivation to enter then we don't know what is! Can't wait to see your creations using I Am Roses Flowers! First, here are the Rules:

Here are the Details/Rules:
  • Contest runs MARCH 15th - APRIL 8th (Ends 11:55pm PST)
  • Theme: "Anything Goes"
  • Minimum (2) I Am Roses Products
  • One project submission per participant
  • One winner will be chosen
  • Participants will upload their project to their blog or forum, Label it “MAR IAR Challenge
  • Participants will add a direct link to their project using the InLinkz tool provided. (*if you are unable to use the tool, leave a comment to this blog post and leave a direct link to your project)
  • Must Subscribe/or be a Follower of the IAR Challenge Blog
  • Winner will be announced alongside the next NEW monthly challenge on the 15th
My card today features this awesome image from Make it Crafty called Alice Hugs White Rabbit. I have a friend who absolutely LOVES Alice in Wonderland so I definitely had her in mind when I created this card.
 
 Copics:
Skin: E000, E00, E01, E02, E11, E04
Hair: YR21, YR24, E35
Blue: B02, B05, B16, B18
Red: R24, R27, R29, R59
White: C1, C2, C3, C5, Colorless Blender
Black: C5, C7, C9
 
I found some gorgeous washi paper in my stash, along with the frilly white ribbon. The wood banner is a sticker. The circle, scallop frame was cut out using a C.C. Designs Die. The flowers, of course, are from I Am Roses.
 
 
Don't forget, you have until APRIL 8th to link up your project. Be sure to use at least 2 products from I Am Roses before linking!
 
Hugs,
Rosie

C.C. Designs: BARKY!

Happy Friday everyone! The MARCH RELEASE is now available for purchase, and it's full of some amazing stamps and a cute Bow Die. Head over to the C.C. Designs Store to pick up yours today. Be sure to use my code ROSEB46 at checkout. :)
 
 
My card features BARKY, along with the Bow Die. I used the little paw print from the Barky Set to create the pattern on the kraft cardstock at the top of the card. The sentiment is also from the Barky Set.
 
Copics:
Puppy: E41, E42, E43, E44, R20, C1 
 
I raised the paw print paper on foam tape for added dimension. The scallop bottom was made using a My Favorite Things Die.
 
  
Grab all your favorites in the C.C. Designs Store today using code: ROSEB46 at checkout. You're going to have so much fun coloring these cuties.
 
Have an awesome day!
Rosie

Thursday, March 7, 2019

C.C. Designs MARCH Release NOW Available!

The MARCH RELEASE is now available for purchase!! Be sure to head over to the C.C. Designs Store to pick up yours today. You definitely don't want to miss out on the awesome stamps and fabulous new BOW Die. 
 
 
I knew when I saw the APRIL & MAY Clear Stamp Set that I wanted to try my hand again at the Rain Shaker Card Tutorial by Laura Dovalo. I'm still trying to figure some things out to keep it from snagging on the paper. I think this time, my foam tape was too thin. Hopefully, the 3rd time is the charm, LOL! 
 
 Copics:
Bear: E41, E42, E43, E44
Blue: B93, B95, B97, B99
Red: R24, R27, R29, R39
Duck: Y15, Y17, YR21, YR23, YR24
Duck Bill: YR04, YR07, YR09, E19
Pink: RV02, RV04, RV06, RV09 


 I used paper from the C.C. Designs Hearts and Dots Paper Pad. I rubbed some DI ink over the top to darken the white dots. Next I die-cut the cloud and grassy border with the C.C. Designs Cloud and Grass Die. The pointy part of the grass was causing issues with the beads falling down behind the green cardstock so I had to trim off the pointy grass edge.
 
  
Be sure to head over to the C.C. Designs Store and grab your favorites before they sell out! If my card inspires you to make a purchase, please click on the Store link in this post or use my affiliate code at checkout: ROSEB46
 
Thank you bunches and have an awesome day!
Rosie

Wednesday, March 6, 2019

C.C. Designs Preview Day 3: BUSINESS DON

Happy Wednesday everyone! We are on Day 3 of Previews of the MARCH Release at C.C. Designs. The release will be available for purchase on March 7th at 12pm CST. There are two adorable clear stamp sets, 2 rubber stamps, a sentiment set, a background stamp, and a new Bow Die. It's another fabulous release!!

Today, I'm showcasing BUSINESS DON with the Thank You Sentiment Set. I stamped him on Xpress It Coloring Card with Memento Tuxedo Black Ink and colored him with Copic Markers.

Copics:
Skin: E000, E00, E01, E02, E11
Hair: E42, E44, E47, E49
Shirt: B95, B97, B99
Pants: C5, C6, C7
Shoes/Belt: B23, B25, B29
Cup: R24, R27, R29, R39
Tie: B93, B97, Gold Sharpie Paint Pen

I kept this card Clean and Simple. I wanted the focus to be on Don and the sentiment. 
 
 
 Don't forget to head over to the C.C. Designs Customer Facebook Page and play along in all the games for a chance at a $20 Store Gift Certificate. Also, be sure to leave a comment on each DT post for ALL Preview Days linked on the C.C. Designs Blog because one lucky winner will take home the ENTIRE RELEASE! 
 
Hugs, 
Rosie

Friday, March 1, 2019

Make it Crafty: Livana Love Letter

 
Happy Friday everyone! My card today features this adorable gal from Make it Crafty called Livana Love Letter. I love the images from the MiC Store! They have a huge variety so you can find something for pretty much any occasion, and they are so much fun to color!
 
Copics:
Skin: E000, E00, E01, E11, E04
Hair: Black, BG78, BG13
Pink: RV02, RV04, RV06, RV09
Black: C5, C6, C7, Black
Boots: C2, C3, C5 
 
I tried to do a card that was somewhat Clean and Simple by adding Heart Splatters from Your Next Stamp and a cute sentiment from Mama Elephant Oh Happy Birds. The panel underneath the girl is just ribbon on top of black cardstock.
 
 
To finish it off, I added black rhinestone bling to the corners and raised Livana on foam tape.
 
 
Don't forget to check out the amazing Coloring Tutorials on the Make it Crafty website. These classes are very affordable and provide so much step-by-step instruction that you will be coloring like a pro in no time. 
 
Zoe also started a site called The Coloring Lab. There is a FREE class on the site now that is fantastic for beginners, but also a great refresher for those who are advanced. It’s definitely worth watching! Please share your creations and coloring in the Make it Crafty Facebook Group. We would love to see your creations!
 
Hugs,
Rosie

C.C. Designs: MONKEYS!

Happy Friday everyone! Today, I'm showcasing a card for C.C. Designs featuring one of my fave sets from the C.C. Designs February Release.....MONKEYS!! I also used awesome paper from both of the new paper pads. The paper pads are 6"x6" and have 16 designs with 2 sheets of each design.
 
 
Aren't these monkey adorable? They seriously make me smile! To put this card together, I first put the green Hearts and Dots Paper on my white card base. Then I glued the patterned paper from Razzle Dazzle Paper Pad to some green cardstock, and die cut a circle out of the center. I placed foam tape under that panel and placed it on top of the green Hearts and Dots Paper.
 
 
 I die-cut some leaves from a Waffle Flower die set and placed them around the cut-out circle on foam tape for even more dimension. I love how the monkeys look like they are jumping out of the frame. This card was so much fun!


  Head over to the C.C. Designs Store and grab your favorites. Please click on my links or use code ROSEB46 at checkout! Don't forget to check out the Monthly Challenges and Tutorials sections of the Store too.
 
Hugs, 
Rosie